

How to Deploy Flagsmith With xCloud One Click Apps
Updated November 9, 2026 · 8 min read
You can run Flagsmith on your own server with xCloud without writing a Docker Compose file. Click New Site, pick Flagsmith in the app catalog, choose a server, enter a site title and the administrator email, choose Demo Site or Go Live, and click Next. xCloud starts Flagsmith with its own database, serves it over HTTPS and shows you the login. This guide walks through each screen up to your first feature flag.
Who this is for: developers and product teams who want feature flags, remote config and A/B tests on a server they control. For server sizes and prices, see Flagsmith hosting on xCloud.
What the Flagsmith app includes
| Part | What you get |
|---|---|
| Flagsmith | The official Flagsmith 2.276.0 image, which serves both the dashboard and the API. |
| Database | PostgreSQL 15.5 in its own container. It is only reachable by Flagsmith, not from the internet. xCloud generates the database name, user and password. |
| Web address | The dashboard on your domain and the API at /api/v1/, behind xCloud’s Nginx with an SSL certificate. |
| Saved data | One volume on the server, which holds your users, organisations, projects, flags, identities and analytics. It survives restarts and redeploys. |
| Administrator account | You enter the email and xCloud generates the password. |
As of November 2026, Flagsmith’s open source edition uses the BSD-3-Clause licence.
Before you start
- An xCloud account that can create sites.
- An Nginx server. xCloud installs Docker on it if it isn’t there yet. The install page recommends 4 GB RAM, 1 vCPU and 10 GB disk. xCloud recommends at least 4 GB RAM when it creates a new server for this app. A server you already have can be smaller: it needs at least 1 GB RAM, 1 CPU core and 10 GB free disk. You can also create a new server during setup.
- An email address for the Flagsmith administrator.
- For Go Live: a domain you can point at the server. For a first try, Demo Site needs no domain.
Step 1: Find Flagsmith in the app catalog
From the xCloud dashboard, click New Site. On What would you like to host today?, type Flagsmith in the search box, then click the Flagsmith card.
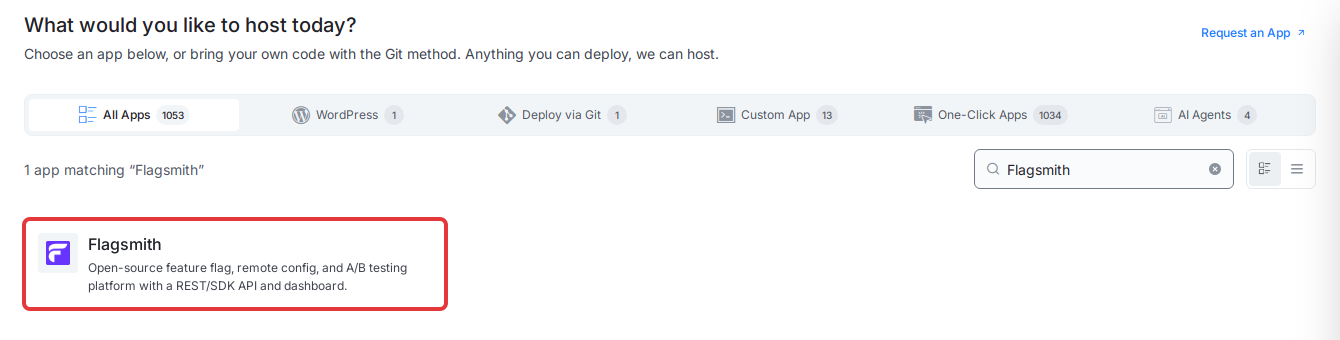
The Flagsmith page opens. It shows Runs on Nginx, Docker and Recommended: 4 GB RAM · 1 vCPU · 10 GB disk.
Step 2: Choose where Flagsmith will run
What you see under Where should it run? depends on the servers in your account.
If you have a server that can run Flagsmith, its card appears next to Deploy on a new server. Each server card shows its RAM, CPU and free disk.
- To use that server: click its card, then click Continue. The form in Step 3 opens.
- To create a new server: click Deploy on a new server. This takes you to server creation, and xCloud brings you back to finish the install.
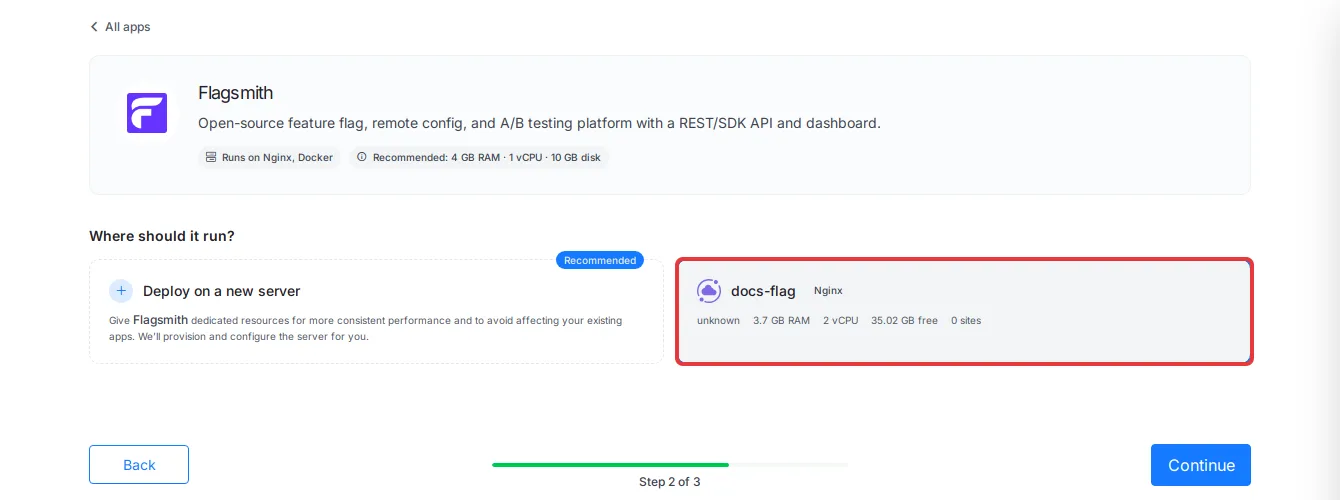
If you have no server that can run Flagsmith, the page says No compatible server yet. and offers two ways to get one:
- Deploy on a new server: click Create Managed Server.
- Use your own provider: click Connect a Provider.
When the server is ready, xCloud brings you back to finish the install.
Servers that can’t run Flagsmith are listed under a line such as 1 server cannot run this app. Click it to see the reason for each one.
Step 3: Add the site title and choose a domain
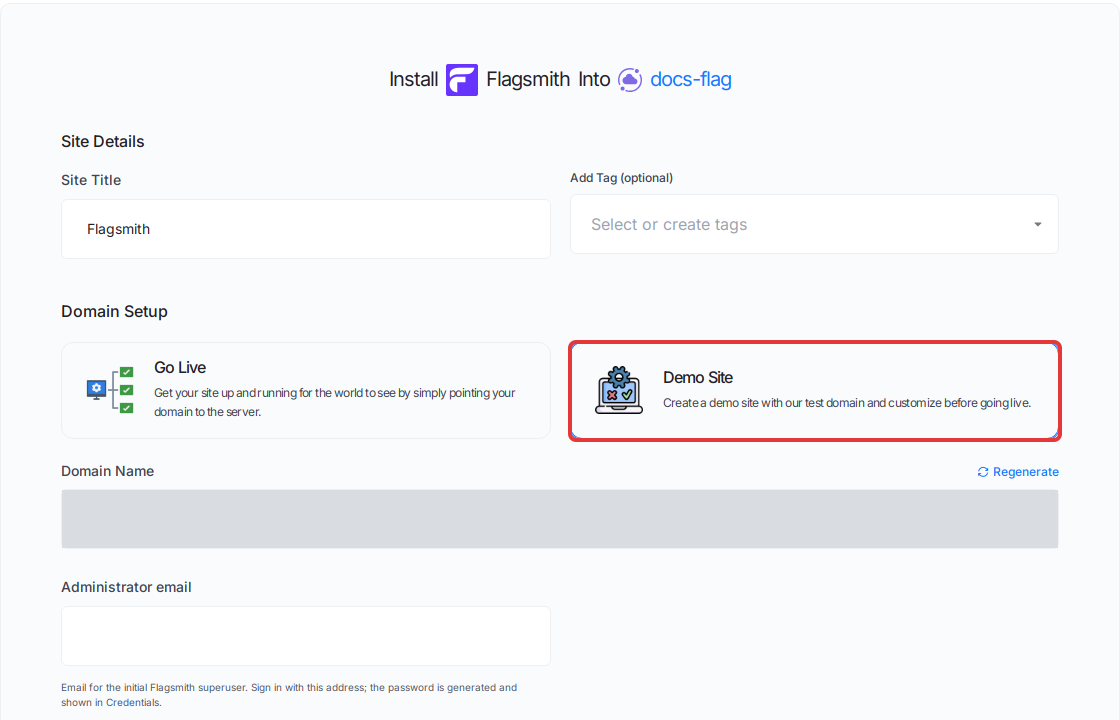
The Install Flagsmith Into form opens.
- Enter a Site Title, for example
Flagsmith. Add Tag (optional) helps you group sites. - Under Domain Setup, choose one:
- Demo Site: xCloud gives you a test domain, shown under Domain Name. Click Regenerate for a different one. Use this to try Flagsmith first.
- Go Live: enter your own domain and point its DNS at the server.
Step 4: Enter the administrator email and install
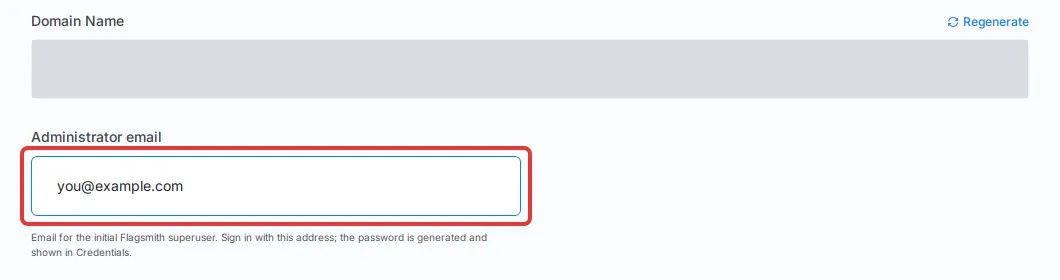
Enter the Administrator email. You sign in to Flagsmith with this address. It is the only Flagsmith field in the form, and it is required. Then click Next.
Step 5: Wait for the setup to finish
xCloud shows a progress page with each stage: checking the server and DNS, installing Docker, setting up the app, SSL, HTTPS, Nginx and monitoring. You can leave this page; the setup keeps running.
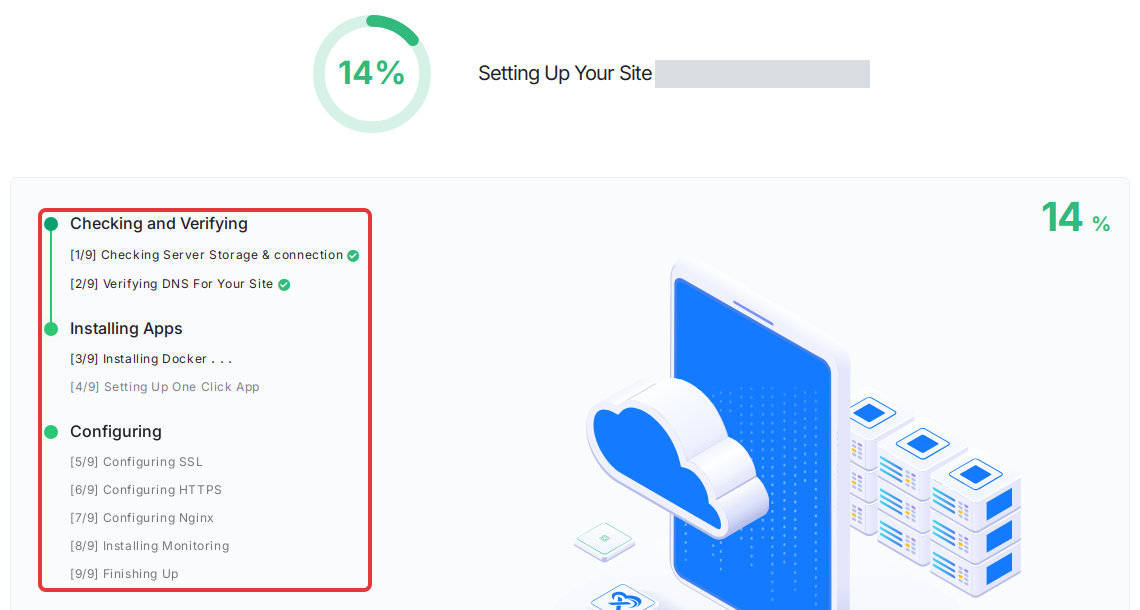
When it finishes, the site’s Site Overview page opens.
If a stage fails, open Recent Events on the site, click View on the failed event, and send that output to support.
Step 6: Copy the Flagsmith login
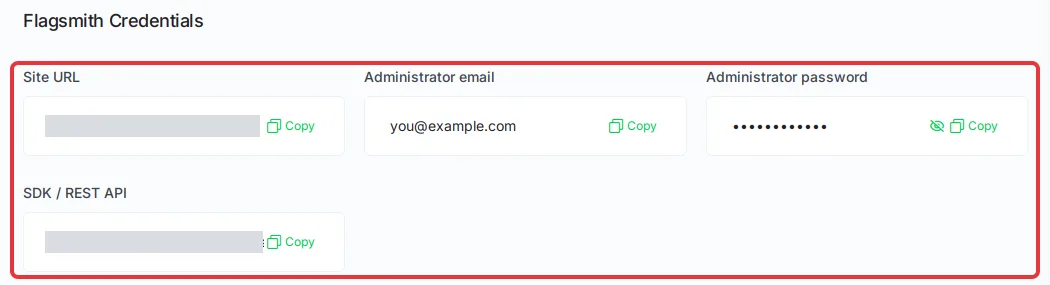
On Site Overview, the Flagsmith Credentials card shows the Site URL, Administrator email, Administrator password and SDK / REST API. Click the eye icon to show the password, or click Copy next to each value.
Step 7: Sign in to Flagsmith
Open the Site URL. On Sign in to Flagsmith, enter the administrator email and the password you copied, then click Log in.
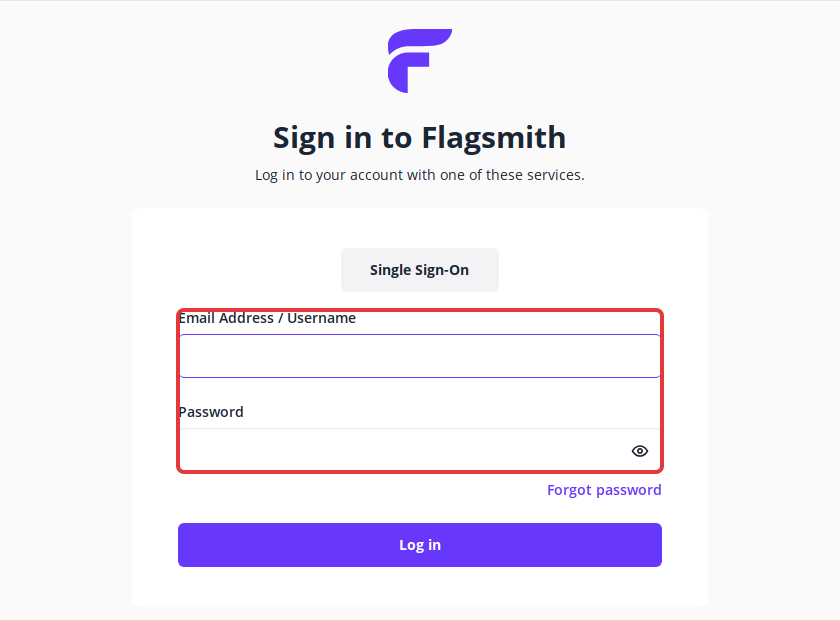
The first start prepares the database before it creates your account, which can take a few minutes. If the login is refused right after setup, wait a minute and try again.
Step 8: Create your organisation
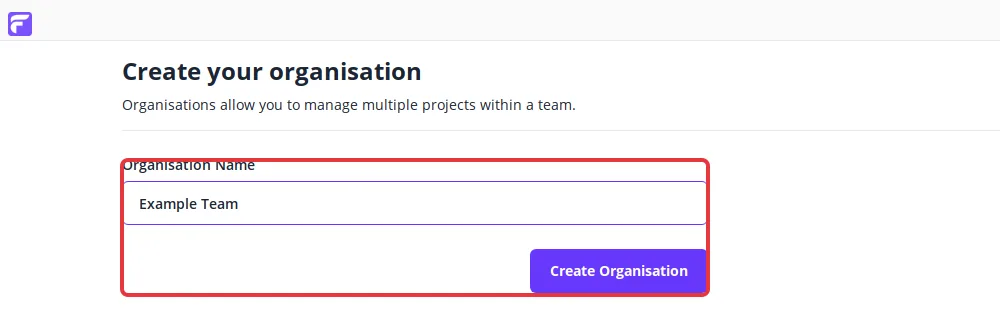
Flagsmith asks for an organisation first. Enter an Organisation Name and click Create Organisation. The next screen asks which tools you use. Click Skip if you don’t want to answer.
Step 9: Create a project
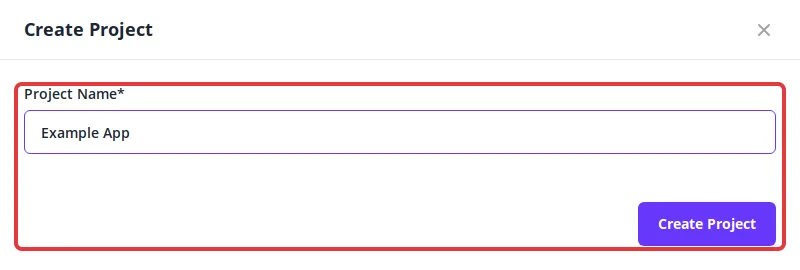
Click Projects, then Create Project. Enter a Project Name and click Create Project in the side panel. Flagsmith creates a Development and a Production environment for the project.
Step 10: Create your first feature flag
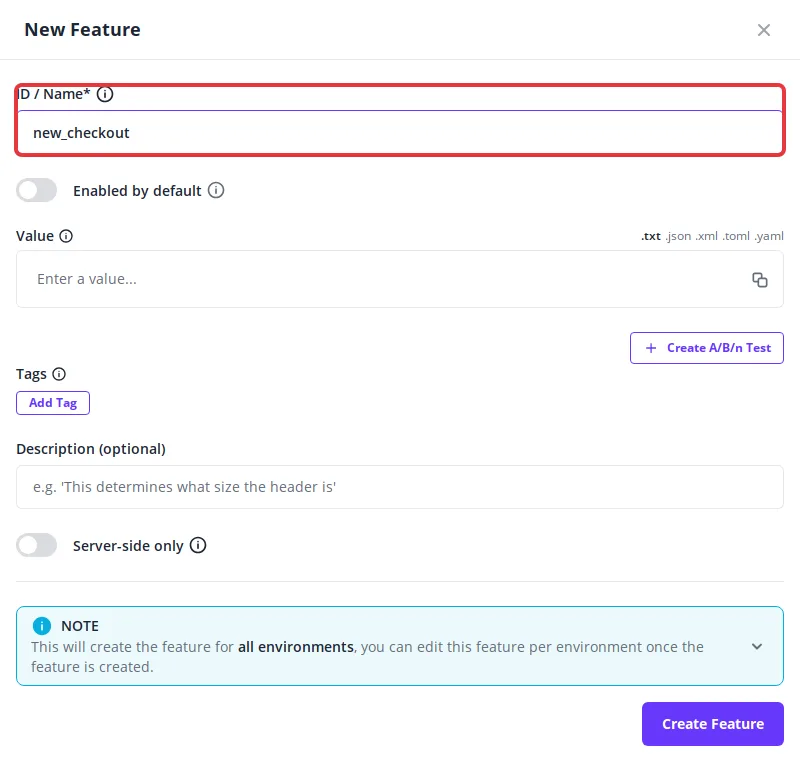
On the project’s Features page, click Create Feature. Enter an ID / Name, for example new_checkout, then click Create Feature at the bottom of the panel. The new flag exists in every environment, and you can turn it on or off in each one separately.
Step 11: Connect your app
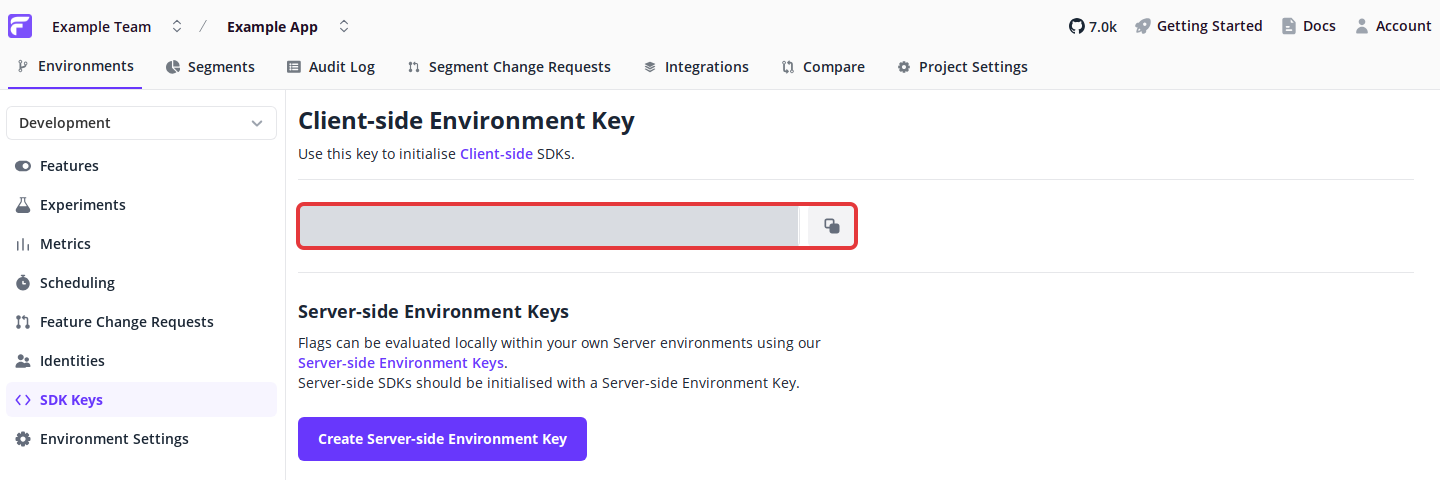
Click SDK Keys in the left menu and copy the Client-side Environment Key. Each environment has its own key, so choose the environment first.
Point your Flagsmith SDK at the SDK / REST API value from the credentials card, which is https://example.com/api/v1/ with your domain in place of example.com. To check that the key works, ask the API for the flags:
curl -H "X-Environment-Key: YOUR_ENVIRONMENT_KEY" https://example.com/api/v1/flags/The answer lists your flags and whether each one is on. A request without a valid key gets a 403 error.
Invite your team
Your teammates can’t create accounts yet, even with an invite link. Public sign-up is closed when the app is installed, so strangers can’t register on your server, and that setting also blocks new accounts that use an invite link. The sign-up form then shows Please check your details and try again.
To let people join only by invite:
- Open the site in xCloud and click Environment in the site menu.
- Change
PREVENT_SIGNUP=truetoPREVENT_SIGNUP=false. - Remove the
#in front ofALLOW_REGISTRATION_WITHOUT_INVITE=false. Skip this and anyone who finds your site can register. - Click Save & Redeploy. The button becomes active once you edit the file. The containers restart briefly, and your flags and accounts stay.

Then, in Flagsmith:
- Click Users and Permissions.
- The role dropdown starts on Organisation Administrator. Check the role before you copy the link. The link gives the role shown in the dropdown. If it shows Organisation Administrator, your teammate gets full control of the organisation.
- Click Copy Invite Link and send the link to your teammate.
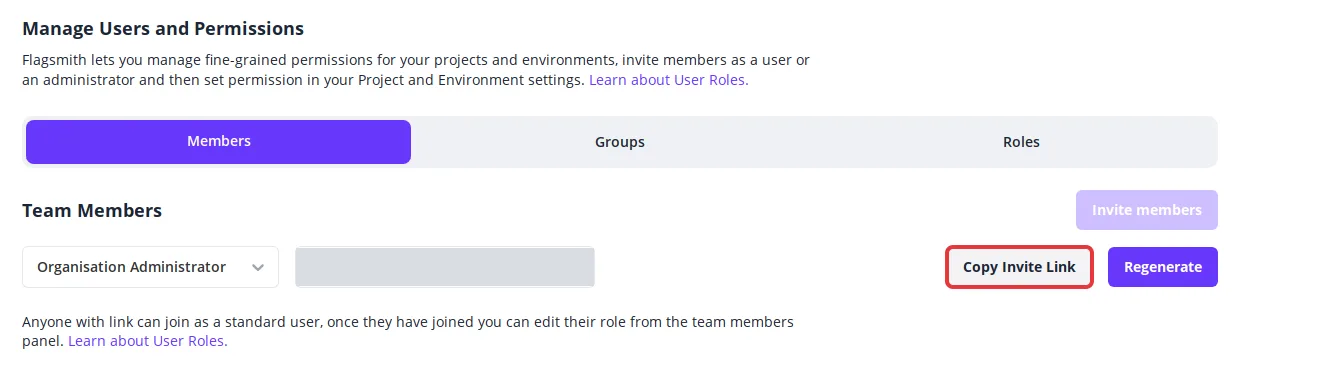
Your teammate creates an account from the link and joins your organisation. Anyone with the link can join, so share it only with people you trust. Click Regenerate if you need a new link.
Invite members is greyed out while no mail server is set up. Flagsmith says email invites need an email provider.
After your first sign-in
Turn on email
Flagsmith sends no email until you add your mail server, and that includes email invites. Add all the settings in one go, because a partial setup won’t deliver mail. On the Environment page:
- Change
EMAIL_BACKENDtodjango.core.mail.backends.smtp.EmailBackend. - Remove the
#in front of these lines and fill them in:EMAIL_HOST: your mail server.EMAIL_HOST_USERandEMAIL_HOST_PASSWORD: your mail login.EMAIL_PORTandEMAIL_USE_TLS: the port and encryption your mail server requires.SENDER_EMAIL: the address your mail is sent from.
- Click Save & Redeploy.
Change the admin password
Change this password inside Flagsmith, not in xCloud. ADMIN_EMAIL and ADMIN_PASSWORD on the Environment page only create the first account. Editing them later doesn’t change that account.
Values to leave alone
DJANGO_SECRET_KEY: keep it the same, or everyone is signed out.POSTGRES_DB,POSTGRES_USERandPOSTGRES_PASSWORD: PostgreSQL reads these only on its first start. To change the password, change it inside PostgreSQL first, as the notice on the Environment page explains, then update the value and redeploy.
Update and back up Flagsmith
- Update: your site stays on Flagsmith 2.276.0, because the app’s
docker-compose.ymlnames that exact version. App Actions → Update pulls that same version again. Moving to a newer one means editing that file by hand, and a wrong edit can break the app. Read the Flagsmith release notes and back up first. Update a One Click App and edit its Docker Compose explains the Compose page and how to recover, and support can help if you’re unsure. Going back to an older version needs a backup taken before the update. - Back up: the one volume holds all your Flagsmith data. See Back up and restore Docker apps for what xCloud backs up and how to restore it.
Common mistakes
- Sending an invite link before changing the sign-up settings. Your teammate sees Please check your details and try again.
- Setting
PREVENT_SIGNUP=falsewithoutALLOW_REGISTRATION_WITHOUT_INVITE=false. Anyone who finds your site can then register. - Changing
ADMIN_PASSWORDon the Environment page and expecting the login to change. Change it in Flagsmith instead. - Using a key from the wrong environment. Development and Production have separate keys and separate flag values.
- Choosing Go Live before the domain’s DNS points at the server. Start with Demo Site, then go live from the demo site.
Frequently asked questions
Do I need to write a Docker Compose file to deploy Flagsmith on xCloud?
No. The Flagsmith One Click App already defines the Flagsmith container, its PostgreSQL database and its storage. You pick Flagsmith in the app catalog, choose a server, enter a site title and the administrator email, choose Demo Site or Go Live, and click Next.
What server does Flagsmith need on xCloud?
An Nginx server. xCloud installs Docker on it if it isn’t there yet. The install page shows Recommended: 4 GB RAM, 1 vCPU and 10 GB disk. xCloud recommends at least 4 GB RAM when it creates a new server for this app. A server you already have can be smaller: it needs at least 1 GB of RAM, 1 CPU core and 10 GB of free disk.
Why does my teammate’s invite link show an error when they create an account?
Public sign-up is closed when the app is installed, and that also blocks new accounts that use an invite link. On the site’s Environment page, set PREVENT_SIGNUP=false, remove the # in front of ALLOW_REGISTRATION_WITHOUT_INVITE=false, and click Save & Redeploy. New accounts then need an invite link.
What API URL do I use in the Flagsmith SDK?
Use the SDK / REST API value on the site’s Flagsmith Credentials card. It is your domain followed by /api/v1/. Your app also needs the environment key from the SDK Keys page in Flagsmith.
Related guides
- Use One Click App templates in xCloud
- Update a One Click App and edit its Docker Compose
- Back up and restore Docker apps
- Go live from a demo site
If you run into any issues while deploying Flagsmith, feel free to reach out to our support team.