

How to Deploy Home Assistant With xCloud One Click Apps
Updated November 7, 2026 · 6 min read
You can deploy Home Assistant on xCloud in a few clicks: New Site → search “Home Assistant” → choose a server → Continue → Site Title and domain → Next. xCloud runs the official Home Assistant image in Docker, keeps your settings on a persistent volume, and puts it on your domain with HTTPS. You never write a docker-compose.yml. This guide is for people who want Home Assistant dashboards and automations for cloud services, MQTT and webhooks, on a server they control.
This install runs in the cloud, not in your home. It can’t use integrations that discover or talk to devices on your home network (local discovery, USB, Zigbee, Z-Wave, Bluetooth). If most of your devices only work locally, run Home Assistant on a machine in your home instead. See the Home Assistant hosting page for plans.
What the xCloud template installs
| Part | What you get |
|---|---|
| App | Home Assistant 2026.9.4, the official ghcr.io/home-assistant/home-assistant image, pinned to that version |
| Web access | Home Assistant on your domain over HTTPS. Its web port (8123) is only reachable through your domain, not by server IP and port. |
| Storage | One persistent volume, ha_config, mounted at /config. It holds your configuration, users, integrations, history database and custom components. |
| First-start setup | A default configuration.yaml, plus network settings that tell Home Assistant to trust xCloud’s HTTPS proxy (127.0.0.1/32 and 172.16.0.0/12). Without them, Home Assistant blocks every request that comes through your domain. |
| Accounts | None. You create the owner account on first visit. |
| Not included | The add-on store, and integrations that discover or talk to devices on your home network (local discovery, USB, Zigbee, Z-Wave, Bluetooth) |
Before you start
| Requirement | What you need | Why it matters |
|---|---|---|
| Server stack | An NGINX server | Home Assistant runs in Docker, and xCloud runs Docker apps on NGINX servers. If the server doesn’t have Docker yet, xCloud installs it during the site install. See enable Docker on an NGINX server. |
| Server size | At least 1 vCPU, 1 GB RAM and 8 GB free disk | xCloud checks these minimums before it installs. Long history, many integrations and cameras need more. |
| Domain (optional) | DNS access, if you choose Go Live | Demo Site gives you a temporary address, so you can start without a domain. |
| Time right after the install | A few minutes to create the owner account | Whoever opens the site first becomes its owner. |
If your server is too small, xCloud tells you before the install starts. See how to upgrade your server.
Step 1: Find Home Assistant in the app catalog
In the xCloud dashboard, click New Site. On What would you like to host today?, type Home Assistant in the Search apps… box, then click the Home Assistant card.
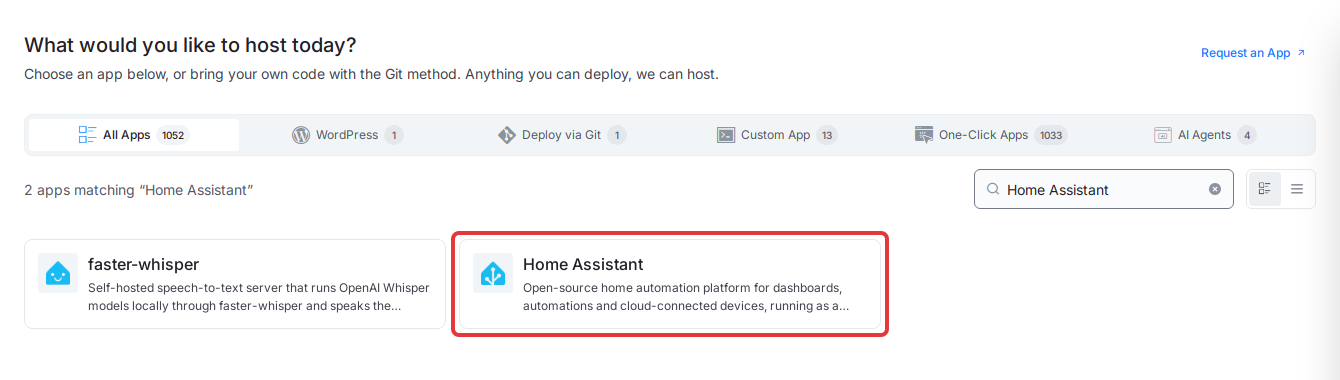
Expected result: The Home Assistant page opens, with the servers you can install it on.
Step 2: Choose where Home Assistant runs
Under Where should it run?, click an existing NGINX server card. The card shows the server’s RAM, CPU, free disk and number of sites. If you don’t have a suitable server, choose Deploy on a new server and xCloud creates one for you.
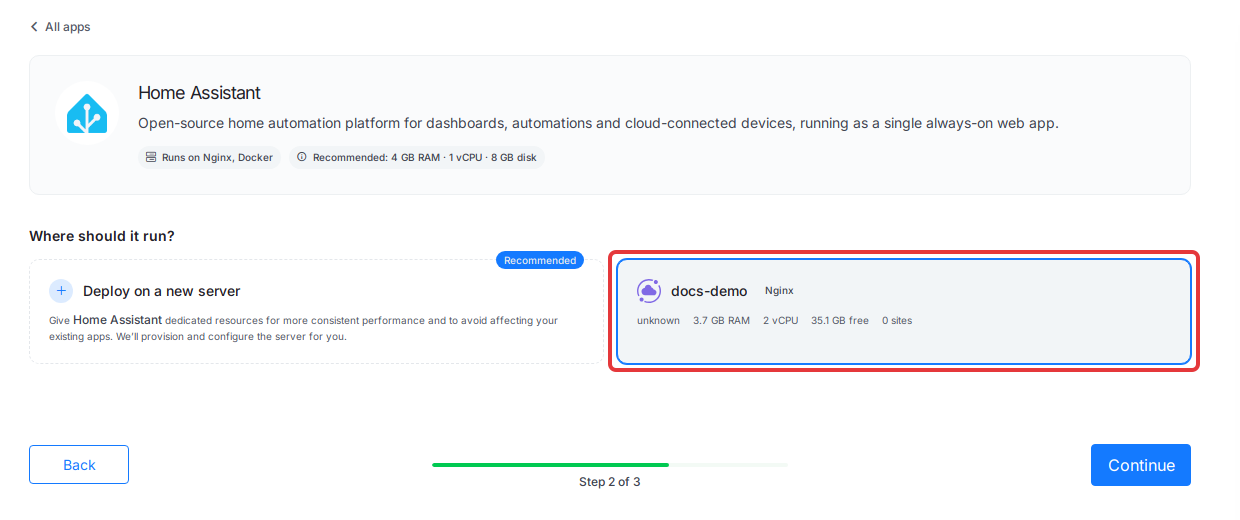
Then click Continue.
Expected result: The Install Home Assistant Into page opens for the server you chose.
Step 3: Enter a Site Title
Under Site Details, type a name in Site Title, for example Home Assistant. Use Add Tag (optional) only if your team sorts sites by tags.
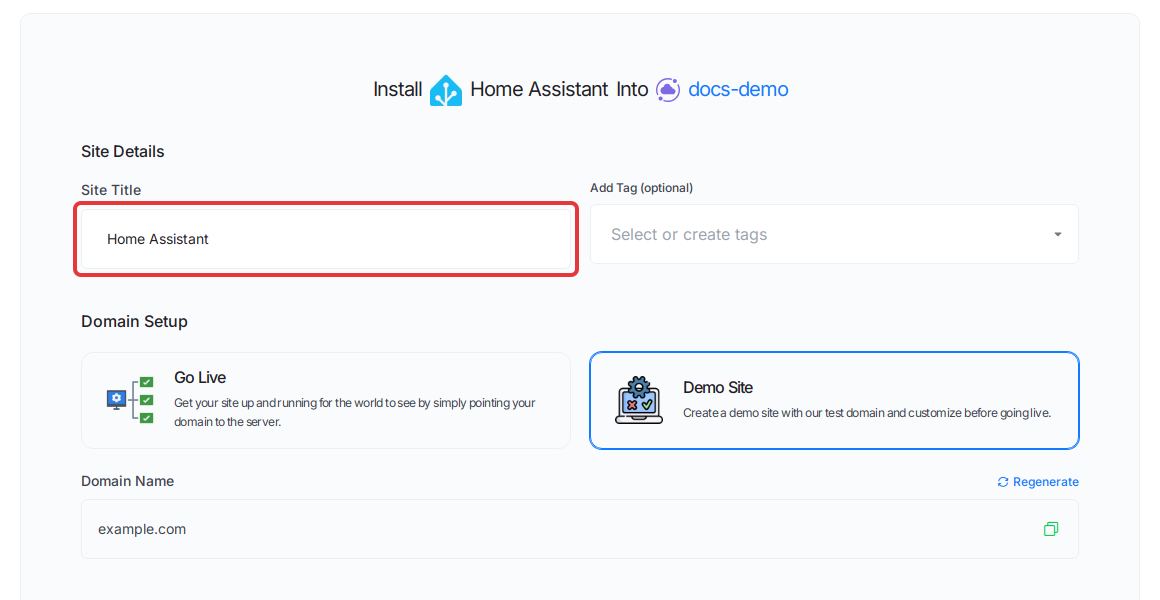
Expected result: The Site Title field shows the name you typed.
Step 4: Choose Demo Site or Go Live
Under Domain Setup, pick one. Demo Site is selected when the page opens.
- Demo Site: xCloud gives you a temporary domain. You can move to your own domain later. Good for a first test.
- Go Live: you enter your own domain, and point its DNS at the server.
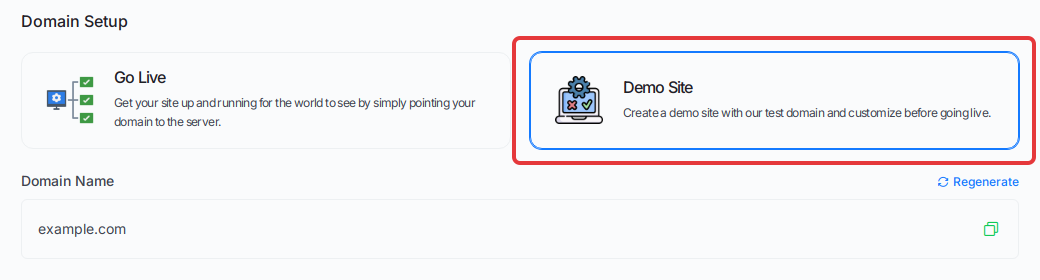
Expected result: With Demo Site, xCloud fills in a Domain Name for you. Click Regenerate if you want a different one.
Home Assistant asks for nothing else. The form has no app settings, because the account is created in Home Assistant itself.
Step 5: Click Next to install Home Assistant
Check the details, then click Next.
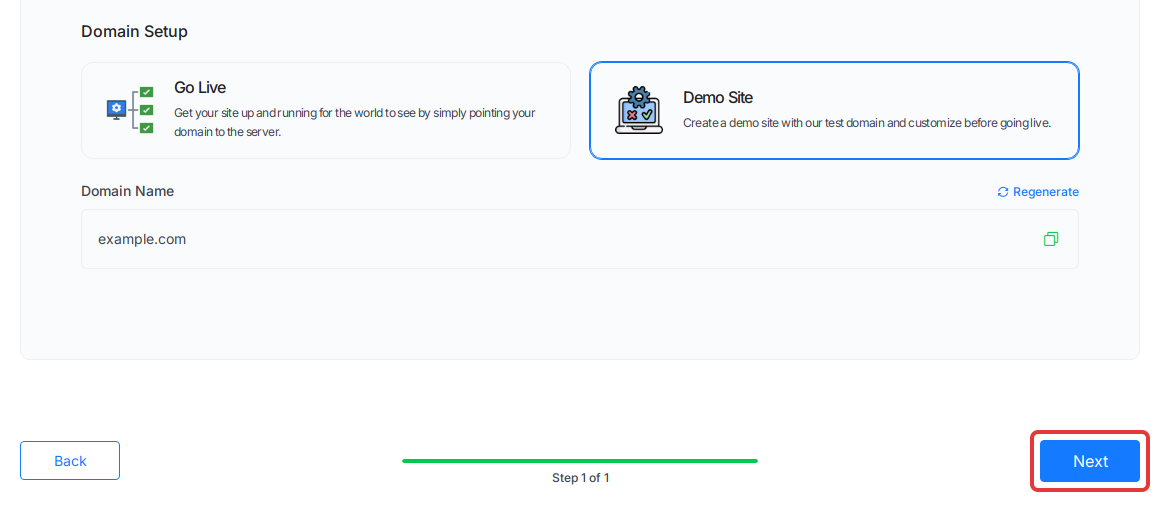
Expected result: xCloud shows the install progress, step by step, until Finishing Up. You can leave the page while it runs. The first install downloads the Home Assistant image, so this step can take several minutes.
Step 6: Open Home Assistant from Site Overview
When the install finishes, the site’s Site Overview opens. The Home Assistant Credentials card shows the site URL. Whoever opens it first becomes the owner, so open it now. Click Visit Site at the top of the page, or copy the URL.
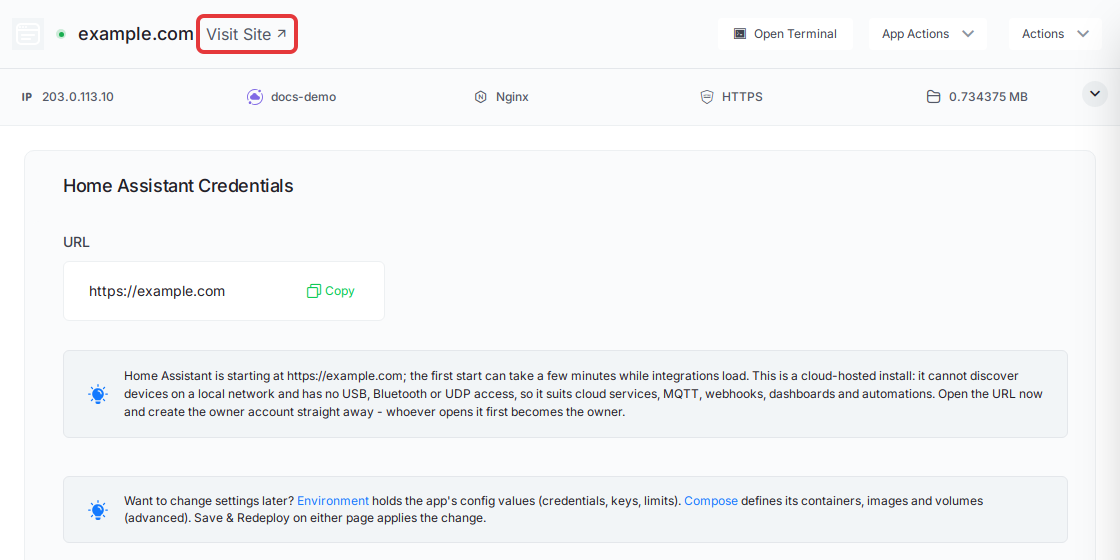
Expected result: The Home Assistant Welcome! page opens. Under Docker Container Health on the overview, the container whose name starts with home-assistant- shows healthy.
The first start can take a few minutes while Home Assistant loads its integrations. If the page doesn’t load yet, wait a minute and reload.
Step 7: Start the Home Assistant setup
On the Home Assistant Welcome! page, click Create my smart home. Do this right away, and don’t share the site address before you have created your account.
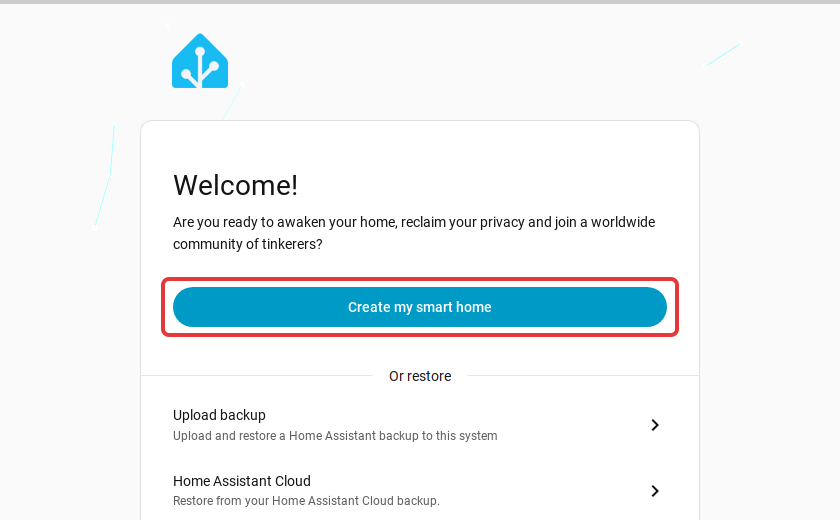
Expected result: The Create user page opens.
If you are moving an existing Home Assistant to xCloud, the Welcome! page also has Upload backup under Or restore.
Step 8: Create your owner account
On Create user, fill in Name, Username, Password and Confirm password, then click Create account. Save the password in your password manager.
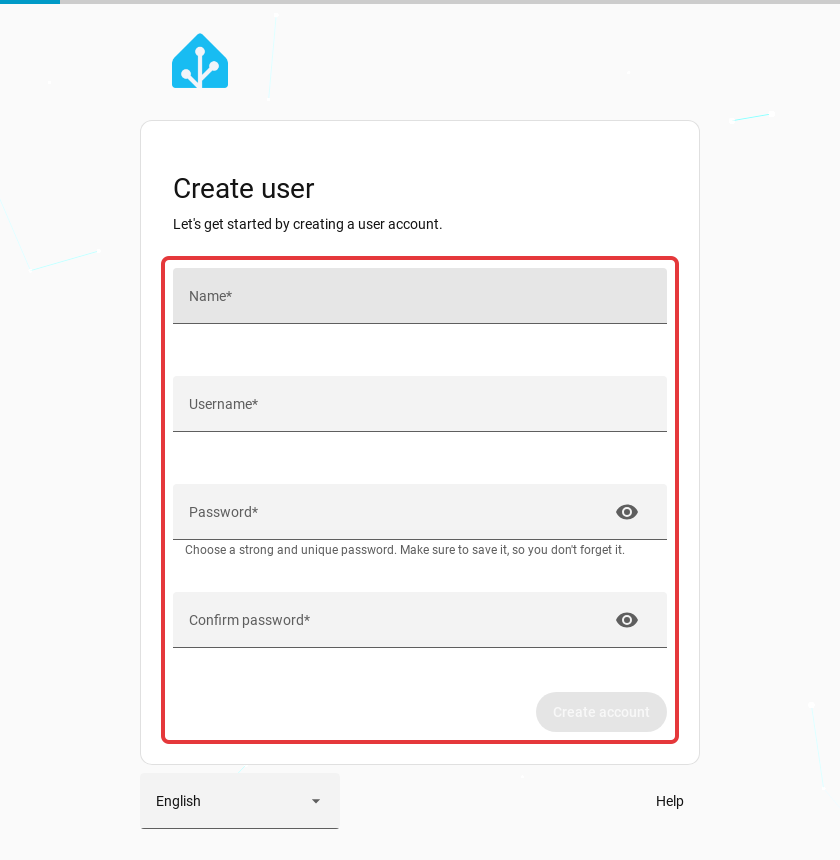
Expected result: Home Assistant creates your owner account and continues with its own setup screens. Follow them to finish, and you are signed in to your new Home Assistant.
After the first sign-in
| Task | What to do |
|---|---|
| Add integrations | In Home Assistant, open Settings → Devices & services and add cloud-based integrations, MQTT or webhooks. Integrations that need your home network, USB or Bluetooth will not work here. |
| Keep the proxy settings | xCloud sets Home Assistant’s web server settings on the first start, outside configuration.yaml. In Home Assistant, open Settings → System → Network. If you change the settings there (Home Assistant HTTP docs), keep the option to trust the X-Forwarded-For header turned on, and keep 127.0.0.1/32 and 172.16.0.0/12 under Trusted proxies. If you remove them, Home Assistant blocks every request through your domain. |
| Add users | Create other accounts from Settings → People in Home Assistant. |
| Back up | Use Backup in the site menu. Back up and restore the whole ha_config volume as one unit. See backing up Docker apps. |
| Watch resources | Large history, many integrations, cameras and media use more RAM and disk. Check the server’s monitoring and upgrade the server when it gets tight. |
Update Home Assistant
xCloud pins Home Assistant to 2026.9.4. App Actions → Update downloads the version set on the Compose page (2026.9.4) again and restarts Home Assistant. Your settings stay. It does not move you to a newer release. Your site keeps the version in its own Compose file.
To move to a newer Home Assistant release:
- Read the Home Assistant release notes for breaking changes in the version you want.
- Back up the site first, including the full
ha_configvolume. - On the site’s Compose page, replace the whole image line, including the
@sha256:…part, with the new version, for exampleghcr.io/home-assistant/home-assistant:2026.10.1, then click Save & Redeploy. Keep the volume name as it is. - Sign in and check your integrations and automations.
The full steps are in Update a One Click App and edit its Docker Compose file.
Troubleshooting
| Symptom | Likely cause | Fix |
|---|---|---|
| Continue stays disabled | No compatible server is selected | Click an NGINX server card that meets the minimums, or choose Deploy on a new server. |
| The site stops loading after you saved network settings | The X-Forwarded-For option was turned off, or 127.0.0.1/32 and 172.16.0.0/12 were removed from Trusted proxies |
Wait a few minutes. Home Assistant may undo unconfirmed web server changes after a few minutes (see the Home Assistant HTTP docs). If the site still doesn’t load, restore a backup of ha_config. |
| Home Assistant is still on the old version after Save & Redeploy | The image line still ends in @sha256:…. That part locks the old version, so the new version number has no effect. |
On the Compose page, remove the @sha256:… part so the line ends with the new version, then click Save & Redeploy again. |
| The page doesn’t load right after the install | Home Assistant is still starting | Wait a few minutes and reload. The first start loads all default integrations. |
| A local device or integration isn’t found | The server is not on your home network | Use a cloud integration or MQTT for that device, or run Home Assistant at home. |
Frequently asked questions
Can Home Assistant on xCloud control the devices in my home?
Only devices and services it can reach over the internet, such as cloud integrations, an MQTT broker the server can reach, and webhooks. It runs on a cloud server, so it can’t discover or talk to devices on your home network, and has no USB, Zigbee, Z-Wave or Bluetooth access.
What is the username and password for Home Assistant on xCloud?
There is none yet. Home Assistant has no preset account. The first person who opens your site creates the owner account, so open it and create yours as soon as the install finishes.
Is the Home Assistant add-on store available?
No. xCloud runs the official Home Assistant Container image, and the add-on store is not part of that image. You can still add integrations from Settings in Home Assistant.
Does App Actions → Update move Home Assistant to a newer version?
No. Update downloads the version set on the site’s Compose page (2026.9.4) again and restarts Home Assistant. Your settings stay. To get a newer version, back up the site, then replace the whole image line on the site’s Compose page with the new version and click Save & Redeploy. Remove the @sha256:… part, or the old version keeps running.
Related resources
- Home Assistant hosting on xCloud, the plans and what is included
- How to use One Click App templates for App Actions, the Environment editor and events
- Deploy n8n with xCloud One Click Apps, another automation app you can run next to Home Assistant
- Explore the One Click Apps catalog
- Upstream: Home Assistant documentation
If Home Assistant does not come up after the install, feel free to reach out to our support team with the site’s failed event output.