

How to Deploy CrowdSec With xCloud One Click Apps
Updated November 9, 2026 · 8 min read
You can run CrowdSec, an open-source security engine, on your own server without writing a Docker Compose file. Click New Site, pick CrowdSec in the app catalog, choose a server, enter a site title and click Next. xCloud starts CrowdSec and generates a key for your first bouncer. This guide covers each screen, then the three things you still need to do: limit access to the port, connect your logs and connect a bouncer.
Who this is for: server owners and developers who want to detect brute-force logins and scans from their logs, and block those addresses with tools they choose. For server sizes and prices, see CrowdSec hosting on xCloud.
How CrowdSec works
CrowdSec splits the job into two parts. CrowdSec itself reads logs and decides which addresses to ban. A bouncer, such as a firewall or web server plugin, asks CrowdSec for those decisions and does the blocking.
After the install, CrowdSec detects nothing on your server and blocks nothing. It can’t see your logs until you connect them, and nothing blocks traffic until you connect a bouncer.
| Part | What you get |
|---|---|
| CrowdSec | The official CrowdSec 1.8.1 image. CrowdSec is released under the MIT licence. |
| Local API | The address your bouncers connect to: http://SERVER_IP:PORT. It uses plain HTTP on a port xCloud picks. There is no domain, HTTPS or web dashboard. |
| Bouncer API Key | A generated 48-character key for a bouncer named default. |
| Community blocklist | When it first starts, CrowdSec connects to CrowdSec’s online service. It sends details of the attacks it detects and gets back a list of known bad addresses. You can turn this off. |
| Stored data | Two Docker volumes: one for decisions and one for settings and registration. |
Before you start
- An xCloud account that can create sites.
- An Nginx server. xCloud installs Docker on it if it isn’t there yet. An existing server needs at least 512 MB RAM, 1 CPU core and 2 GB free disk. You can also create a new server during setup. A new server you buy through xCloud needs at least 4 GB RAM.
- For the later steps: a way to run commands as an administrator on the server, through SSH as a sudo user or a server session in the web terminal. The site’s own user can’t run Docker commands.
Step 1: Find CrowdSec in the app catalog
From the xCloud dashboard, click New Site. On What would you like to host today?, type CrowdSec in the search box, then click the CrowdSec card.
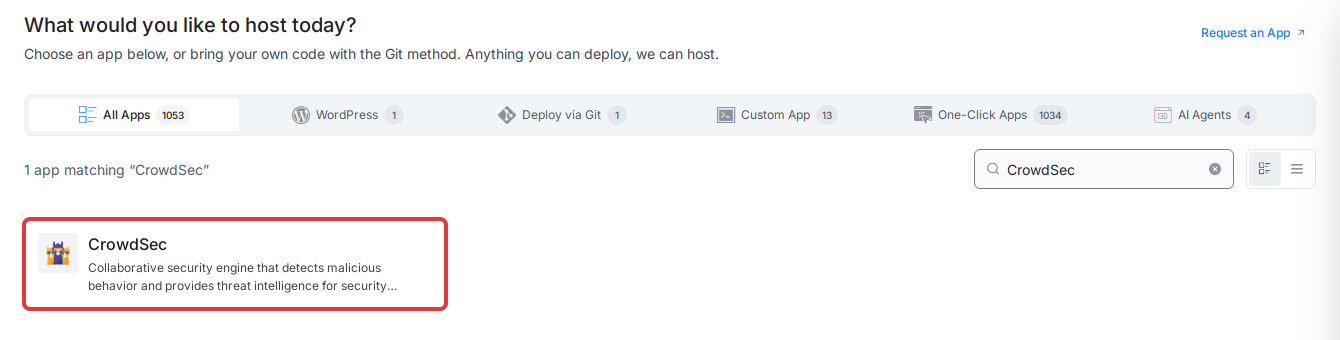
Expected result: The CrowdSec page opens. It shows Runs on Nginx, Docker and the recommended size: 4 GB RAM · 1 vCPU · 2 GB disk. An existing server can be smaller, as listed under Before you start.
Step 2: Choose where CrowdSec will run
Under Where should it run?, pick one option:
- Deploy on a new server: xCloud creates and sets up a server only for CrowdSec.
- Or click the card of an existing server. Each card shows the server’s RAM, CPU and free disk.
Click Continue.
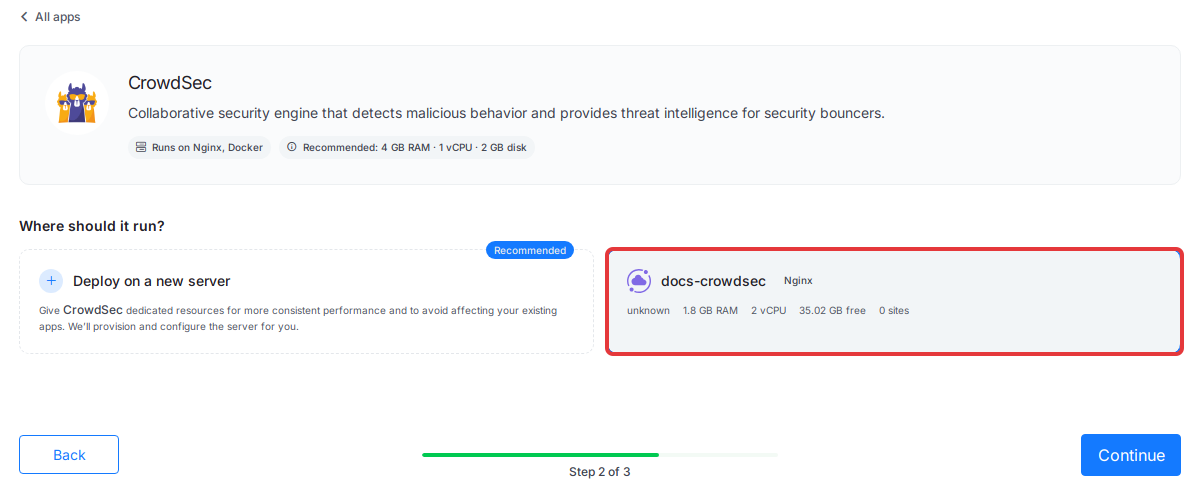
Expected result: The Install CrowdSec Into form opens.
Step 3: Enter a site title
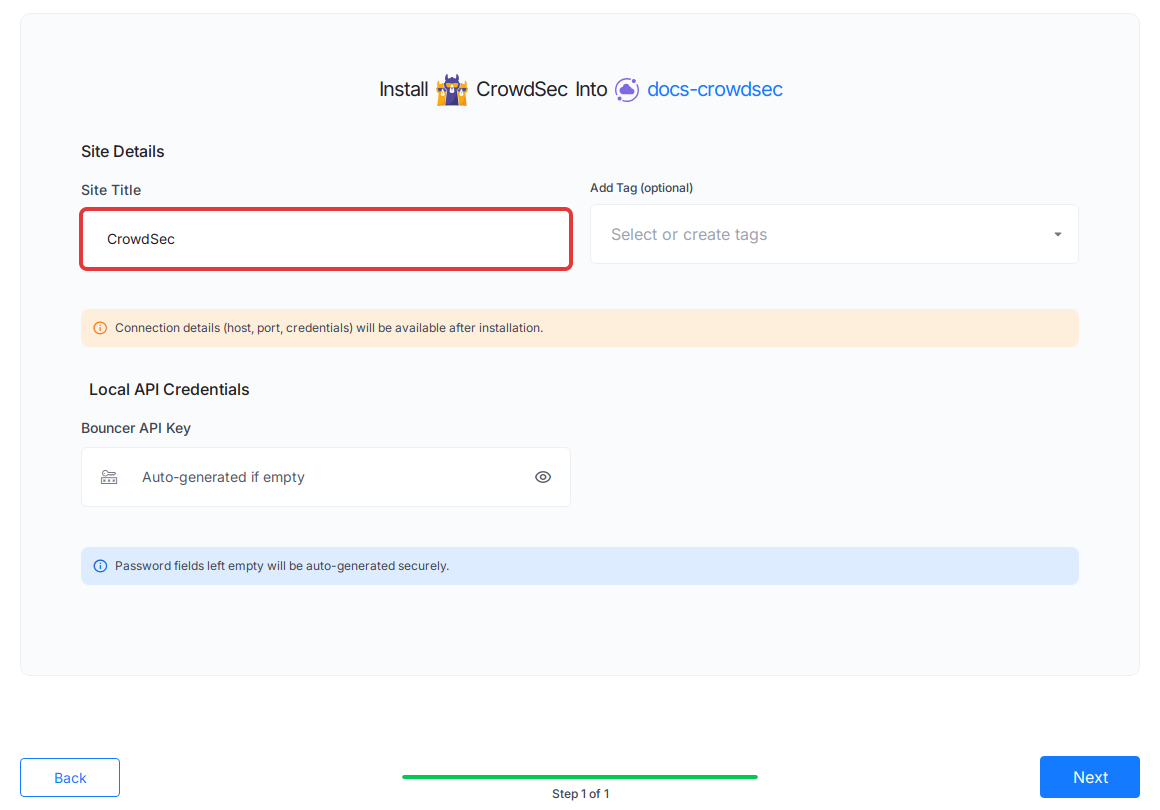
- Enter a Site Title, for example
CrowdSec. Add Tag (optional) helps you group sites. - Leave Bouncer API Key empty. xCloud generates one for you.
- Click Next.
There is no domain step, because CrowdSec doesn’t use a domain. xCloud generates the site’s name for you.
Step 4: Wait for the setup to finish
xCloud shows a progress page with five stages, from checking the server to finishing up. You can leave this page; the setup keeps running.
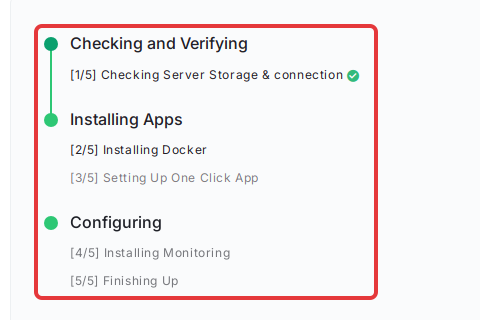
Expected result: When the last stage finishes, xCloud opens the site’s Site Overview page, with the CrowdSec Credentials card at the top.
If a stage fails, open Recent Events on the site, click View on the failed event and fix what it reports. Then try again, or contact support with the event output.
Step 5: Copy the Local API address and key
Open the site’s Site Overview page. The CrowdSec Credentials card shows Local API, Health endpoint and Bouncer API Key. Click Copy next to each value you need.

To check that it works, run these from your own computer. Use your address in place of SERVER_IP:PORT and your key in place of YOUR_BOUNCER_KEY:
curl http://SERVER_IP:PORT/health
curl -H "X-Api-Key: YOUR_BOUNCER_KEY" "http://SERVER_IP:PORT/v1/decisions?ip=198.51.100.10"
Expected result: The first command returns {"status":"up"}. The second returns null, which means CrowdSec has no ban for that address. A request with a missing or wrong key gets a 403 error and access forbidden.
Step 6: Limit who can reach the port
The port can be reached from outside as soon as CrowdSec starts, unless your cloud provider’s firewall blocks it. Anyone who can reach it can read /health. Your key also travels unencrypted, because the Local API uses plain HTTP. So limit the port to the machines that need it.
The note on Site Overview tells you to restrict this port with your firewall. Don’t use the server’s Firewall Management page for this. A rule there doesn’t block this port, because Docker, which runs the app, sets its own network rules (see Docker’s packet filtering and firewalls documentation). You also don’t need to add a rule there to open the port.
Choose one of these instead:
-
Bouncers only on this server (recommended): open Compose, change
0.0.0.0to127.0.0.1on the port line as shown below, click Save & Redeploy and confirm. The port then answers only on the server itself, so usehttp://127.0.0.1:PORTas the address. The credentials card still shows the server’s IP. To check it, run the/healthcommand from Step 5 on another machine and confirm that it gets no answer.ports: - '127.0.0.1:${PORT_LAPI}:8080' -
Bouncers on other servers: if your cloud provider offers a firewall, add a rule there that limits the port to those servers. Then run the
/healthcommand from Step 5 on a machine you didn’t allow, and confirm that it times out. If you get an answer, the port is still open.
Step 7: Connect your server logs
CrowdSec needs two things before it can read a log: access to the folder, and a file that says which log to read. This example reads SSH logins. The rules for SSH attacks are already installed.
First, give CrowdSec read-only access to the server’s logs:
-
Open the site in xCloud and click Compose in the site menu.
-
Under
volumes:in thecrowdsecservice, add this line belowcrowdsec_config:/etc/crowdsec. Keep the two existing lines, because removing or renaming a volume can delete the app’s data.- /var/log:/var/log/host:ro -
Click Save & Redeploy and confirm.

Next, find the container’s name. It is in the Docker Container Health table on Site Overview, under Container Name.

Then run these commands on the server as an administrator. Use your container’s name in place of CONTAINER_NAME:
sudo docker exec CONTAINER_NAME sh -c 'mkdir -p /etc/crowdsec/acquis.d && printf "filenames:\n  - /var/log/host/auth.log\nlabels:\n  type: syslog\n" > /etc/crowdsec/acquis.d/ssh.yaml'
sudo docker restart CONTAINER_NAME
Wait for new SSH activity on the server, then check what CrowdSec has read and found:
sudo docker exec CONTAINER_NAME cscli metrics show acquisition
sudo docker exec CONTAINER_NAME cscli alerts list
sudo docker exec CONTAINER_NAME cscli decisions list
Expected result: The first command lists file:/var/log/host/auth.log with the lines it read and understood. After repeated failed logins from one public address, the alerts list shows crowdsecurity/ssh-bf and the decisions list shows a ban for that address. Private network addresses don’t get banned by the default rules.
Backups grow with this change. An xCloud Docker backup also copies folders you mount, so your backups now include the server’s logs. See back up and restore Docker apps.
For other logs, add the matching rules with COLLECTIONS (next section) and add another file like ssh.yaml. CrowdSec’s data sources guide lists the options.
Step 8: Connect a bouncer
A bouncer does the blocking. Choose and install one from CrowdSec’s bouncer list, then give it your Local API address as the API URL and your Bouncer API Key as the API key.
To confirm the connection, list your bouncers:
sudo docker exec CONTAINER_NAME cscli bouncers listExpected result: The default bouncer shows a time under Last API pull, which is when that key last asked CrowdSec for decisions. The key check in Step 5 also sets this time, so look for a time later than when you started your bouncer.
The key belongs to one bouncer. For a second one, create its own key and copy the value it prints:
sudo docker exec CONTAINER_NAME cscli bouncers add my-second-bouncerChange settings on the Environment page
Open the site in xCloud and click Environment in the site menu. Edit the file, then click Save & Redeploy. The button becomes active once you edit the file, and the container restarts briefly. To turn on an optional line, remove the # at the start of it.

| Setting | What it does |
|---|---|
COLLECTIONS |
Rule sets to install from the CrowdSec Hub, separated by spaces. For example: crowdsecurity/nginx crowdsecurity/sshd. |
DISABLE_ONLINE_API |
Set to true to stop sending attack details to CrowdSec and stop receiving the community blocklist. |
ENROLL_KEY, ENROLL_INSTANCE_NAME |
Connect this install to the optional CrowdSec Console, a separate service from CrowdSec. |
Your settings and the file you added in Step 7 stay in place after a redeploy, because they are stored in a Docker volume.
Replace the Bouncer API Key
Editing BOUNCER_KEY_default alone does not change the key, because CrowdSec only reads it the first time the bouncer is registered. To replace it:
-
Delete the bouncer:
sudo docker exec CONTAINER_NAME cscli bouncers delete default -
On the Environment page, enter a new value for
BOUNCER_KEY_default, then click Save & Redeploy. You can make a value withopenssl rand -hex 24. -
Update your bouncer with the new value.
The credentials card keeps showing the old key after this. The old key stops working, so copy the new value from the Environment page instead.
Update and back up CrowdSec
- Update: your site stays on CrowdSec 1.8.1, because the app’s
docker-compose.ymlnames that exact version. Update in the App Actions menu pulls that same version again. You find App Actions at the top of the site’s page and next to the site in your site list. To move to a newer one, read the CrowdSec release notes and take a backup. Then, on the Compose page, change the version number on theimage:line (and remove the@sha256:…part after it, or replace it with the new one), as described in Update a One Click App and edit its Docker Compose. - Back up: decisions, settings and registration live in the
crowdsec_dataandcrowdsec_configvolumes. Keep them together, because restoring only one can leave them out of step. See back up and restore Docker apps.
Common mistakes
- Expecting protection right after the install. Without logs and a bouncer, CrowdSec doesn’t detect or block anything on your server.
- Adding a Firewall Management rule and assuming the port is now closed. If your bouncers run on this server, bind the port to
127.0.0.1instead, then test from another machine. - Reading a
bandecision as a block. The address stays able to connect until a bouncer acts on the decision. - Running
docker execas the site’s user. It gets a permission error, so connect as an administrator. - Copying the key from the credentials card after you replace it. That card still shows the old key.
Frequently asked questions
Does CrowdSec block attacks by itself after I install it?
No. CrowdSec detects attacks and makes ban decisions. A separate tool called a bouncer reads those decisions and does the blocking, so traffic is only blocked once you connect a bouncer.
Can the Firewall Management page limit who reaches the Local API port?
No. A Firewall Management rule does not block this port, because Docker, which runs the app, sets its own network rules. If your bouncers run on the same server, make the port reachable only from the server itself by binding it to 127.0.0.1 in Compose. Otherwise, use your cloud provider’s firewall if it has one.
Why doesn’t CrowdSec get a domain or HTTPS on xCloud?
CrowdSec has no web dashboard. It runs as a service on a port of your server, so xCloud shows no domain setup for it. The Local API uses plain HTTP, so its traffic is not encrypted.
What server does CrowdSec need on xCloud?
An Nginx server. xCloud installs Docker on it if it isn’t there yet. An existing server needs at least 512 MB of RAM, 1 CPU core and 2 GB of free disk. A new server you buy through xCloud needs at least 4 GB of RAM, which is why the install page shows 4 GB RAM, 1 vCPU and 2 GB disk as its recommended size.
Related guides
- Use One Click App templates in xCloud
- Update a One Click App and edit its Docker Compose
- Back up and restore Docker apps
If you run into any issues while deploying CrowdSec, feel free to reach out to our support team.