

How to Deploy a Vite App (React, Vue, Svelte) from Git on xCloud
Updated November 15, 2026 · 6 min read
You can deploy a Vite app (React, Vue, Svelte or plain JavaScript) on xCloud straight from its Git repository. xCloud reads your package.json, recognizes Vite, runs npm run build and serves the built files from dist/. No Node.js process runs after the build, and every push to your branch can publish a new version.
This guide walks through the first deploy, the settings xCloud fills in for you, environment variables, your own domain, and what to check when a build fails.
How xCloud sets up a Vite app
When vite is in your package.json dependencies, xCloud labels the repository Vite and fills in these settings:
| Setting | What xCloud picks |
|---|---|
| App Type | Node.js (Node.js builds the app, even though the result is static) |
| Serving mode | Static build |
| Web root | dist |
| Build & deploy script | Installs your dependencies, then runs npm run build |
This is the same for React, Vue and Svelte projects made with npm create vite@latest. If your package.json has no build script, xCloud warns you: “No build script found in package.json — set the build command.” Add "build": "vite build" to your scripts, or edit the build script yourself before you deploy.
SvelteKit, Nuxt and Next.js are different. They render pages on the server, so xCloud runs them as a Node.js process. See How to Deploy a Node.js Application for those.
Before you begin
- An xCloud server with the Nginx or OpenLiteSpeed stack. You can also create one during these steps.
- Your Vite project in a Git repository, with
package.jsonin the repository root. Public repositories work without any setup. For a private repository, connect your Git provider first. - A
buildscript inpackage.json. New Vite projects have one by default.
Step 1: Choose your framework in the app list
Open Sites and click Add New Site. On What would you like to host today?, type vite in Search apps and click the React or Vue card. For a Svelte app, search for svelte and click the Svelte card.
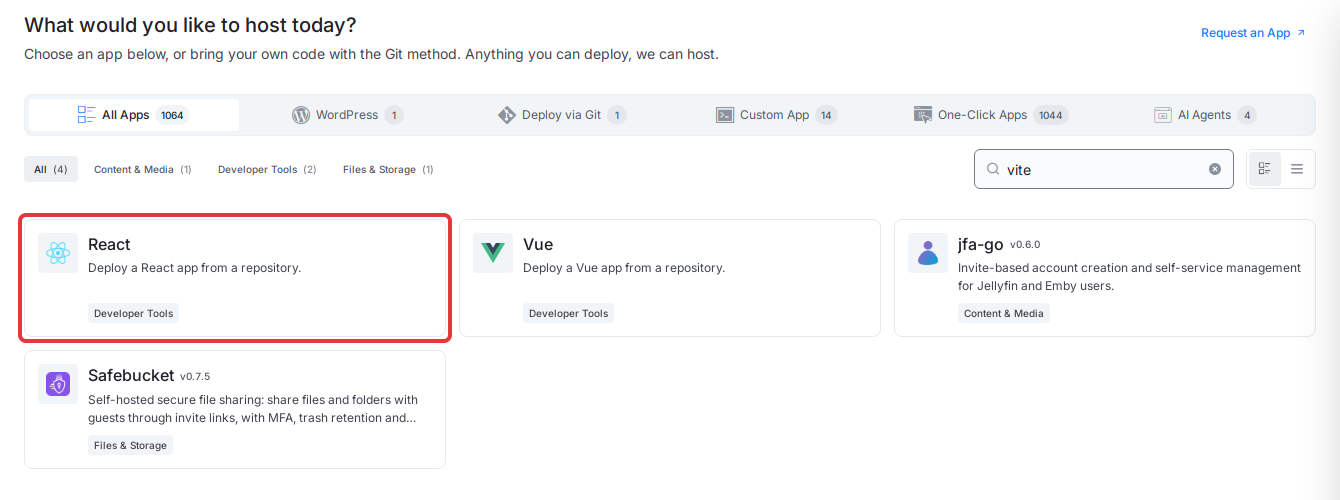
All three cards open the same Git setup screen, and xCloud detects the real stack from your repository. You can also pick a server first and open the Deploy via Git tab.
Step 2: Pick the server
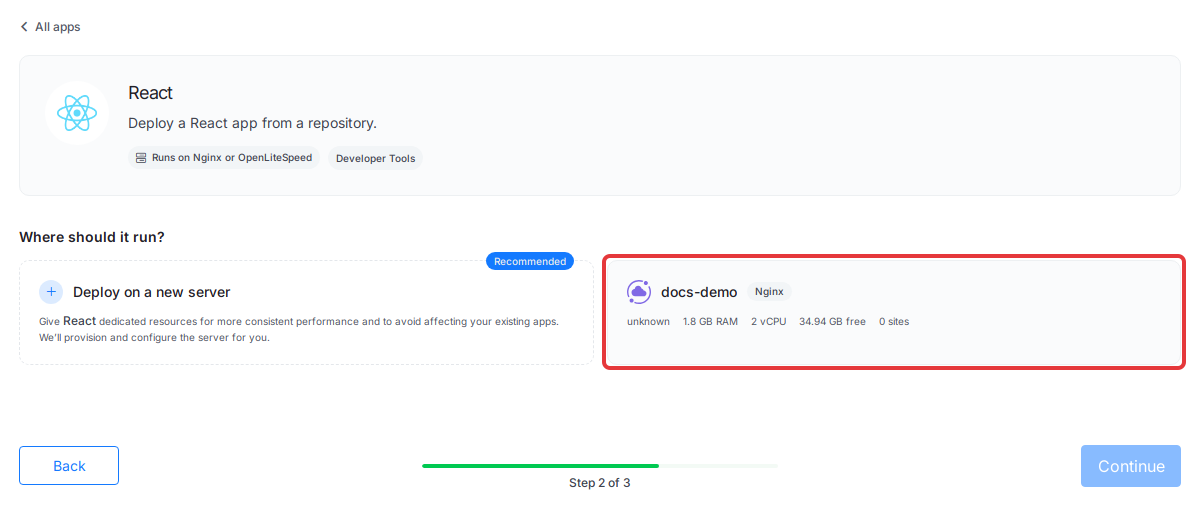
Under Where should it run?, select the server for your app and click Continue. If you have no Nginx or OpenLiteSpeed server yet, choose Deploy on a new server and xCloud brings you back here once the server is ready.
Step 3: Add your repository
In Deploy Any App From Git, paste your repository URL and press Enter. For a private repository, switch to Private Repository and pick it from your connected account.
xCloud reads the repository and shows Native app with a Vite label. App Type is set to Node.js.
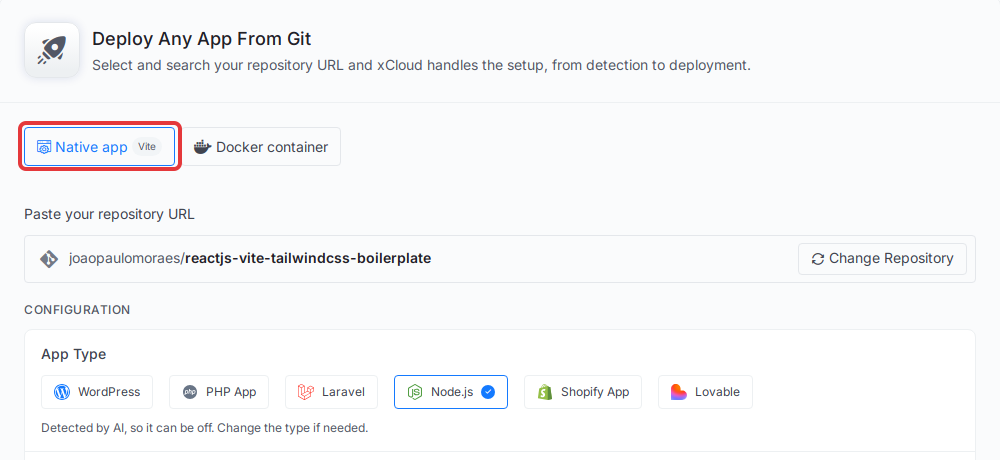
Detection is a suggestion. If it picked the wrong type, click the right one before you continue.
Step 4: Check domain and branch
Keep the free Staging domain (no DNS) to test first, or click Use a live domain instead to use your own domain. Check that Branch is the branch you want to publish. xCloud fills in the repository’s default branch.
Step 5: Check the build settings
Scroll to Build & serving. Serving mode is Static build and Web root is dist. Leave them as they are unless you changed build.outDir in your Vite config. In that case, type your folder name in Web root.
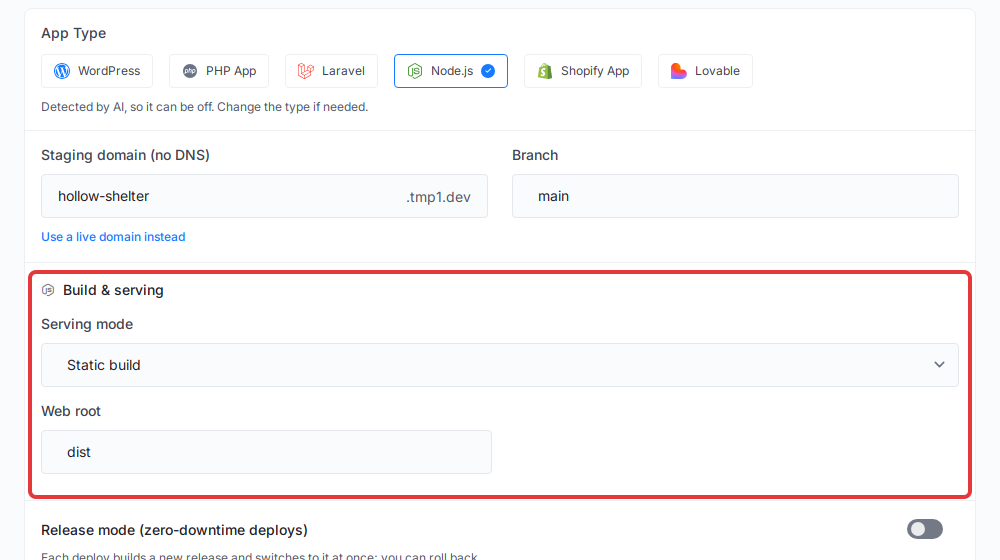
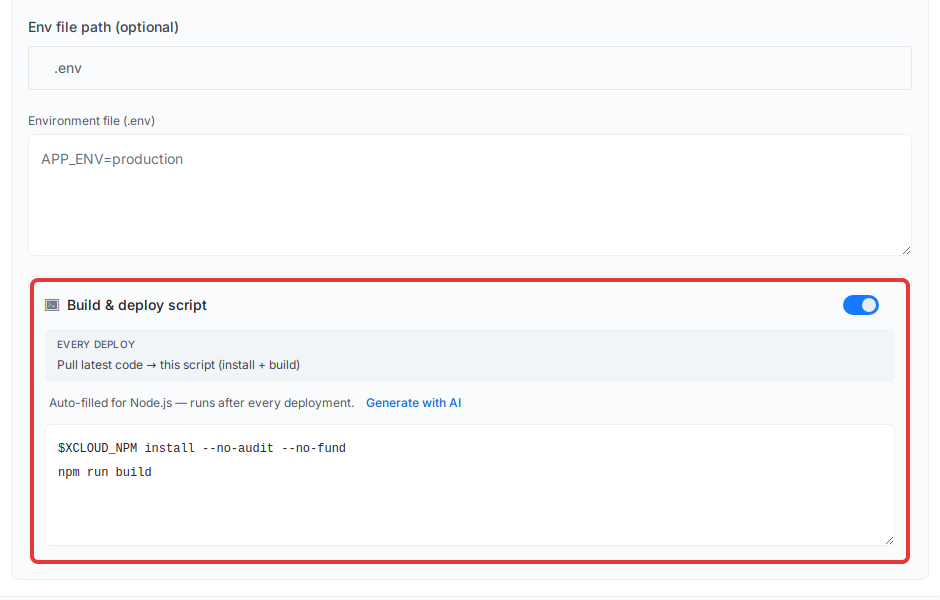
To see the build commands, open Advance and find Build & deploy script. It installs your dependencies and runs npm run build on every deploy. You can edit it, for example to run a different script.
Step 6: Add environment variables (optional)
Under Advance, add the values your app needs to Environment file (.env), not to your repository.
Vite reads these values while it builds and puts them into the files your visitors download. Only variables that start with VITE_ reach your app code (see the Vite guide to env variables). Never put a secret key in a VITE_ variable. After you change a value, deploy again so the build picks it up.
Step 7: Deploy
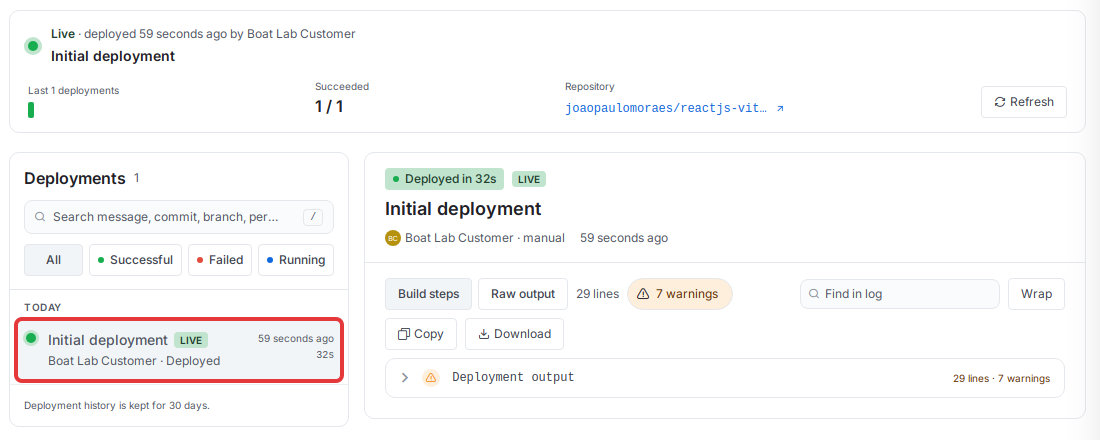
Check the Summary and click Deploy. xCloud pulls your code, installs dependencies, runs the build and publishes the dist folder. When it is done, open Deployments on the site. The latest deployment shows LIVE.
Client-side routes work out of the box. When a visitor opens a path that is not a real file, such as /about, xCloud serves your index.html and your router loads the page.
If the build fails
Open the failed deployment on the Deployments page and read Build steps to see which step stopped. The common causes for a Vite app:
- No index.html in the web root. The deploy fails with a message that the web root contains no
index.htmlafter the build. Check that Web root matches yourbuild.outDir, then click Deploy Now. - A type check or lint error. Many templates run
tscbeforevite build. Fix the error locally (runnpm run buildon your computer), push, and xCloud deploys again. - The wrong Node.js version. If your dependencies need a newer Node.js, see How to Change Node Version with xCloud.
See How to View Git Deployments for Your Site in xCloud for more on this page, and Troubleshooting Git Deployments if a deployment is stuck or doesn’t start on push.
Update your app with a Git push
After the first deploy, publishing a change is a push:
- Turn on Auto-deploy on push (webhook) for repositories from a connected Git provider. xCloud can add the webhook for you when your account has admin access to the repository.
- Push to the branch you deployed. xCloud pulls the new code, rebuilds the app and publishes the new
distfolder. - To deploy without a push, click Deploy Now at the top of the site.
If you see Release mode (zero-downtime deploys) when you create the site (Nginx servers only), turn it on to be able to go back to an earlier version in one click. See Roll Back a Deployment in xCloud.
Add your own domain and SSL
If you started on a staging domain, add your own domain from the site’s Domain menu, point its DNS to your server, and xCloud sets up a free SSL certificate. How to Deploy Git Projects in One Click with xCloud shows the DNS options, including one-click verification for domains on Cloudflare.
Building with Astro instead? See How to Deploy an Astro Site from Git on xCloud.
Frequently asked questions
Does my Vite app need a Node.js process on the server?
No. xCloud runs npm run build during each deploy, and the web server then serves the built files from dist. Nothing keeps running in Node.js between deploys.
Which folder does xCloud serve for a Vite app?
The dist folder, which is where vite build writes your app by default. If you changed build.outDir in your Vite config, change the Web root field to match before you deploy.
Do client-side routes like /about work when someone refreshes the page?
Yes. When a path is not a real file, xCloud serves your index.html, so React Router, Vue Router and other client-side routers load the right page.
How do I update my Vite app after it is live?
Push to the branch you deployed. With Auto-deploy on push turned on, xCloud builds and publishes the new version. You can also click Deploy Now on the site.
That’s it! Your Vite app is live on xCloud and updates whenever you push.
Still stuck? Contact our dedicated support team for any of your queries.