

How to Deploy OpenWebUI With xCloud One Click Apps
Updated November 16, 2026 · 7 min read
You can deploy OpenWebUI on xCloud in a few clicks: New Site → search “OpenWebUI” → choose a server → Continue → Site Title, domain and admin login → Next. xCloud runs OpenWebUI in Docker on an NGINX server, puts it on your domain with HTTPS, and creates your admin account. You never write a docker-compose.yml. This guide is for teams and developers who want a private AI chat screen on a server they control.
OpenWebUI is a self-hosted web interface for AI models. It works with Ollama and OpenAI-compatible APIs, so the model you connect does the work and OpenWebUI gives you the chat screen, the accounts and the history. See the OpenWebUI hosting page for plans, or browse every app in the One Click Apps catalog.
Before you start
| Requirement | What you need | Why it matters |
|---|---|---|
| Server stack | An NGINX server | OpenWebUI runs in Docker, and Docker apps run on NGINX servers. OpenLiteSpeed servers can’t run Docker. |
| Memory | 4 GB RAM recommended | The catalog recommends 4 GB. Add more if you plan to run Ollama models on the same server. |
| Disk | Plan on 10 GB free | xCloud needs 5 GB free to start the install (15 GB with Ollama). The download used about 7 GB on our test server, so plan on 10 GB. |
| A model | Ollama, or an API key from a provider | OpenWebUI has no model of its own. You connect one in Step 9. |
| Domain (optional) | DNS access, if you choose Go Live | Demo Site gives you a temporary address, so you can start without a domain. |
What xCloud installs
| Part | What you get |
|---|---|
| App | One OpenWebUI container, using the ghcr.io/open-webui/open-webui:main image. You get the newest release at install time. See the OpenWebUI releases page for the current version. |
| Your data | Chats, accounts and uploads are stored in the data folder of your site, at /var/www/YOUR_DOMAIN/data. |
| Access | OpenWebUI is only reachable through your domain over HTTPS, not by server IP and port. |
| Accounts | Sign-up is closed. xCloud creates one admin account from the details in Step 5. |
| Limits | The container can use up to 1 GB of memory and 0.2 of a CPU core, so pages can feel slow while it starts. |
Step 1: Find OpenWebUI in the app catalog
In the xCloud dashboard, click New Site. On What would you like to host today?, type OpenWebUI in the search box, then click the OpenWebUI card.
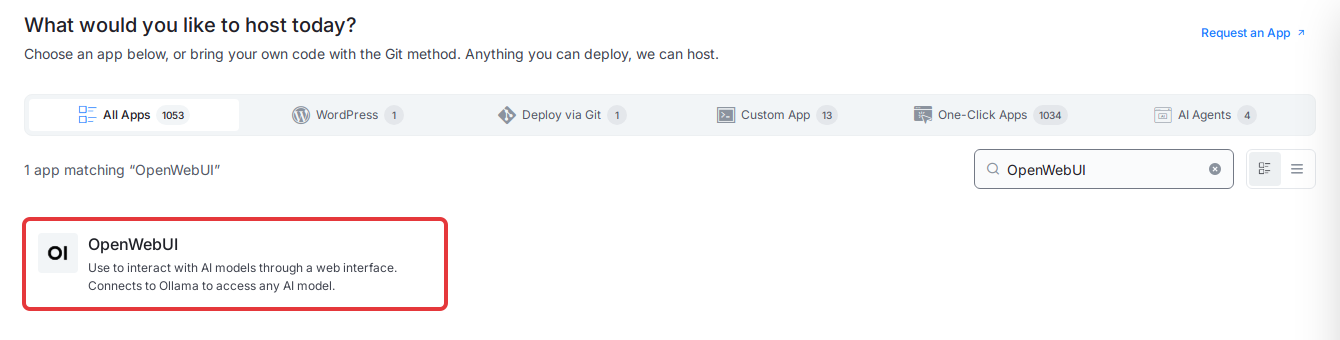
Expected result: The OpenWebUI page opens. It shows Runs on Nginx, Docker and Recommended: 4 GB RAM · 5 GB disk. The 5 GB is the minimum xCloud checks before it installs; plan on 10 GB, as noted in Before you start.
Step 2: Choose where OpenWebUI runs
Under Where should it run?, click an existing NGINX server card. The card shows the server’s RAM, CPU, free disk and number of sites. If you don’t have a suitable server, choose Deploy on a new server and xCloud creates one for you.
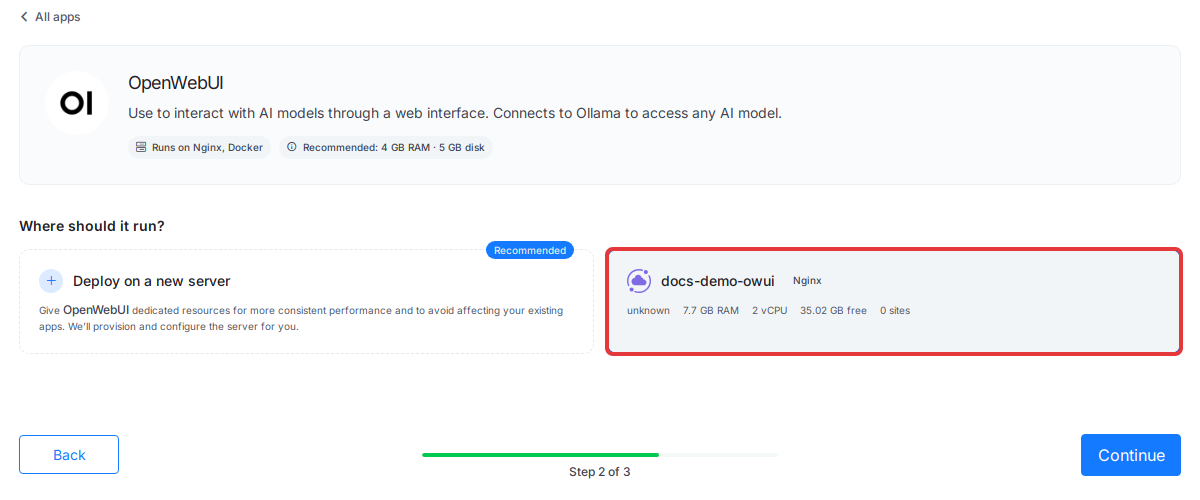
Then click Continue.
Expected result: The Install OpenWebUI Into page opens for the server you chose.
Step 3: Enter a Site Title
Under Site Details, type a name in Site Title, for example OpenWebUI. Use Add Tag (optional) only if your team sorts sites by tags.
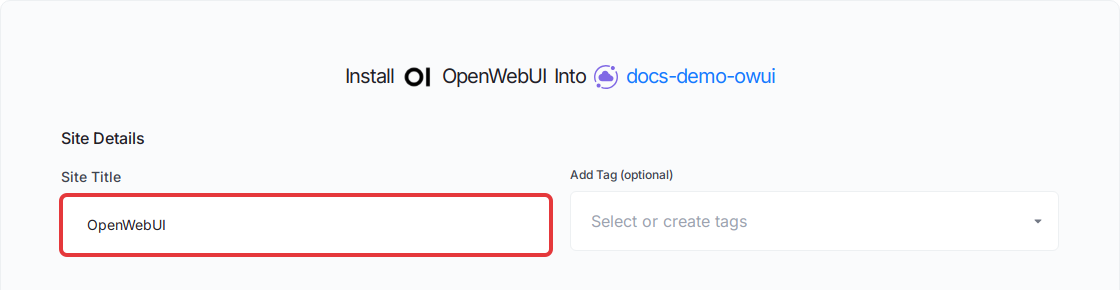
Expected result: The Site Title field shows the name you typed.
Step 4: Choose Demo Site or Go Live
Under Domain Setup, pick one:
- Demo Site: xCloud gives you a temporary domain. You can switch to your own domain later. Good for a first test.
- Go Live: you enter your own domain, and point its DNS at the server.
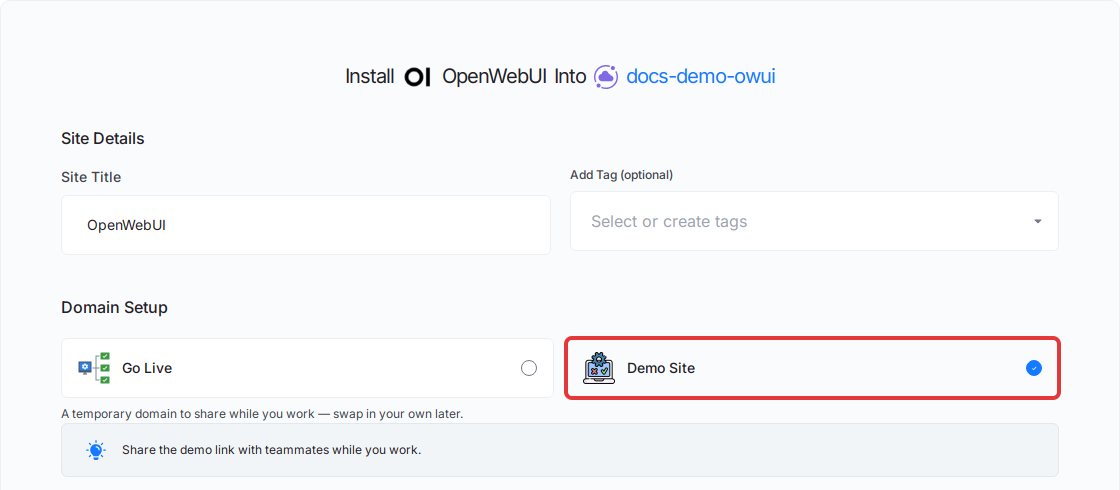
Expected result: With Demo Site, xCloud fills in a Domain Name and a Site User for you. You can keep both.
Step 5: Set your admin login
Under Admin User, xCloud fills in a strong Admin Password and your account email as the Admin Email Address. Change either one if you like, and copy the password before you go on.
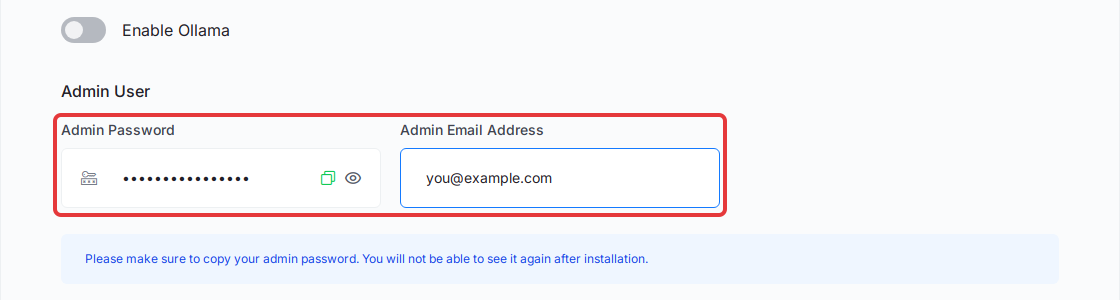
The Enable Ollama switch above these fields only turns on if the server already has an Ollama site. If it’s off, leave it. You can add Ollama after the install in Step 9.
Expected result: Both fields have a value. This is the login you use in Step 8.
Step 6: Click Next to install OpenWebUI
Check the details, then click Next.
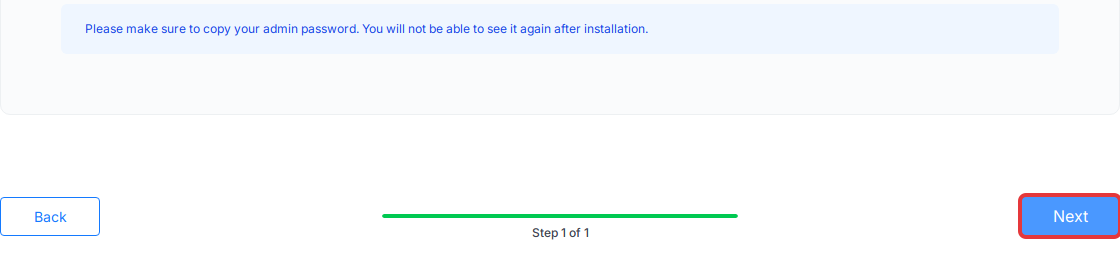
Expected result: xCloud opens the progress page. It checks the server, installs Docker if needed, sets up OpenWebUI, adds HTTPS and sets up the domain. On our test server this took about three minutes. When it finishes, the site opens in the dashboard.
If the install stops with a disk space error, free up space or pick a server with more free disk, then try again.
Step 7: Find your login details
In the site menu, open Access Data → Credentials. The Admin User is your email, and Admin Password is the password from Step 5.
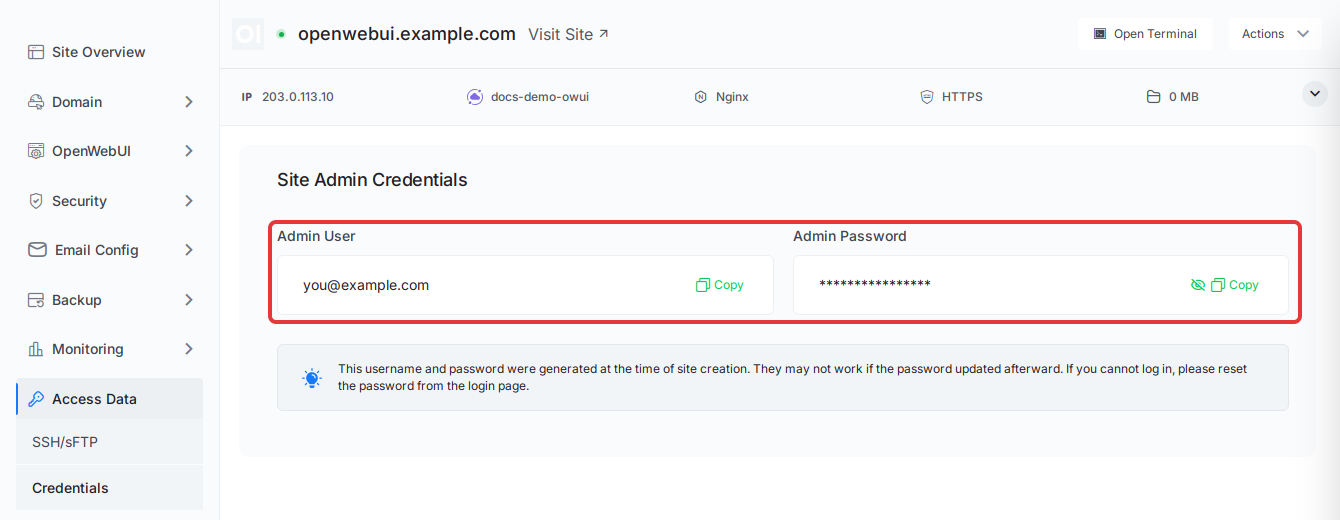
Expected result: You can copy both values from this page.
Step 8: Sign in to OpenWebUI
Click Visit Site at the top of the site page.
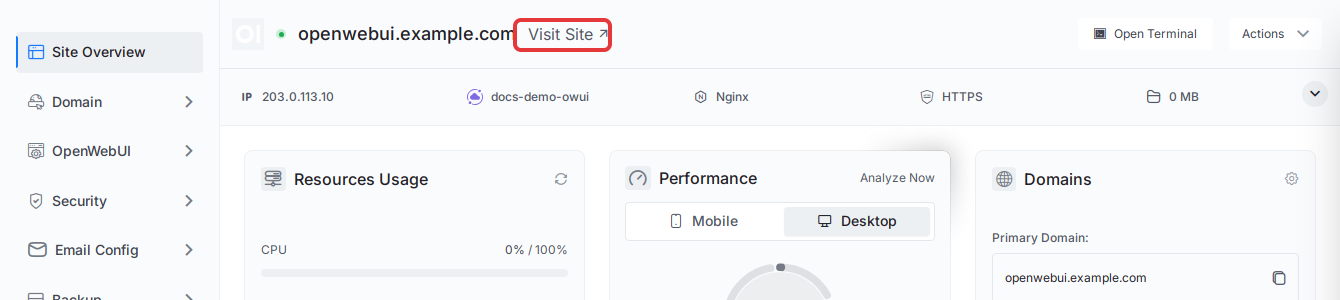
On Sign in to OpenWebUI, enter your Admin User email and Admin Password, then click Sign in.
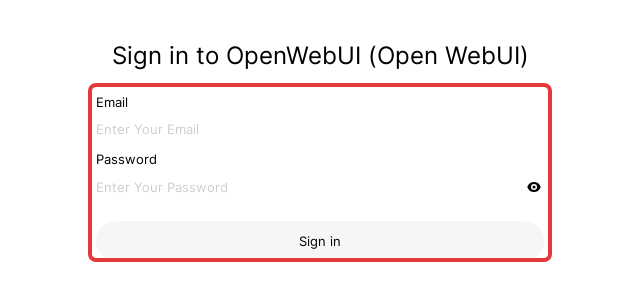
Expected result: The chat screen opens and greets you as Admin. If the site shows a 502 error first, wait a few minutes and reload. OpenWebUI is still starting.
Step 9: Connect a model
Until you connect a model, OpenWebUI shows Select a model with nothing to choose. Pick one of these two ways.
Option A: Run models on the same server with Ollama
In the site menu, open OpenWebUI → Enable Ollama.
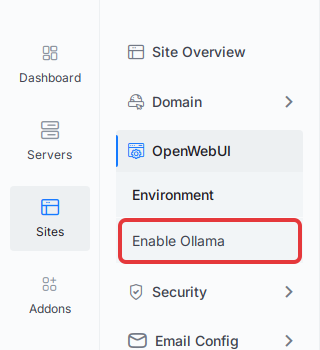
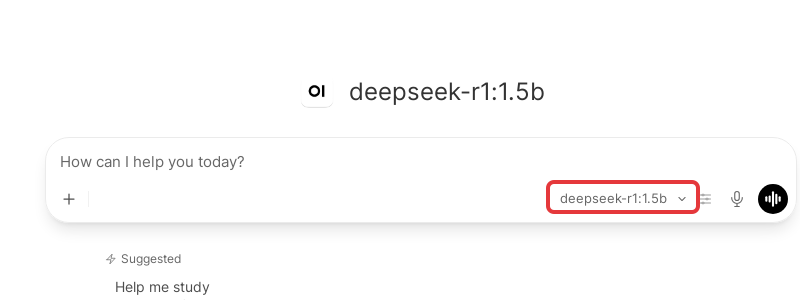
xCloud starts installing Ollama. It adds Ollama to the same server as a separate site, downloads a small first model (deepseek-r1:1.5b, about 1.1 GB) and restarts OpenWebUI. On our test server this took about three minutes. The server needs 15 GB of free disk for this.
Expected result: The menu now shows OpenWebUI → Management, with the model listed as Installed. Click Add New Model there to download more.

OpenWebUI then shows the model’s name in the chat box, ready to use. Reload the page if you don’t see it yet.
Every model needs memory, so match models to your server. For model sizes and how to remove a model, see How to Deploy Ollama With xCloud One Click Apps.
Option B: Use an API provider
In OpenWebUI, open your profile menu, then Admin Panel → Settings → Connections. Next to Manage OpenAI API Connections, click +, then enter your provider’s API URL and key. Any OpenAI-compatible provider works. The model runs at the provider, so your server doesn’t need extra memory for it.
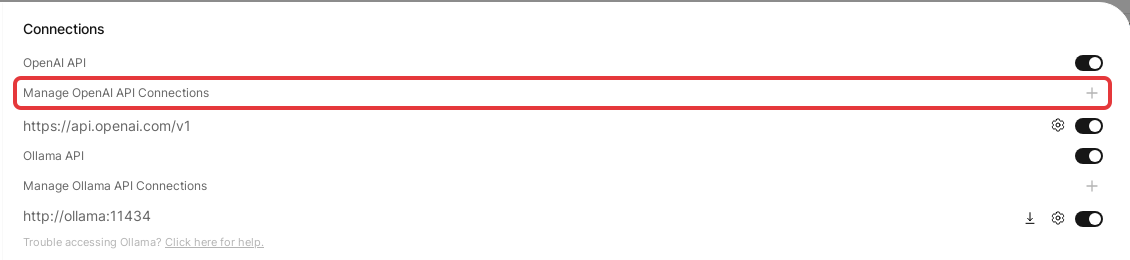
Expected result: The provider’s models appear in the model list.
Add other people
xCloud installs OpenWebUI with sign-up closed, so strangers can’t create accounts on your domain. To add a teammate, open Admin Panel → Users in OpenWebUI and click Add User.
If you later turn sign-up on, new accounts wait as pending until an admin approves them.
Update OpenWebUI
xCloud has no Update button for OpenWebUI. The App Actions → Update option in the One Click App update guide is for apps installed from templates, and OpenWebUI is not one of them.
To update OpenWebUI, contact the xCloud support team and tell them the site’s domain. Don’t run docker compose yourself from the site folder: xCloud runs the app from its own copy of the compose file, not the docker-compose.yml you see there.
Back up first so your chats are safe if the update fails. See how to back up and restore Docker apps.
Troubleshooting
| Problem | Likely cause | Fix |
|---|---|---|
| No server can be picked in Step 2 | The server isn’t NGINX, or it’s short on free disk | Use an NGINX server with enough free disk, or choose Deploy on a new server. |
| The install fails on disk space | Less than 5 GB free, or 15 GB with Ollama | Free up disk space, then try again. |
| Enable Ollama can’t be switched on during install | The server has no Ollama site yet | Finish the install, then use OpenWebUI → Enable Ollama. |
| The domain shows a 502 error right after install | OpenWebUI is still starting | Wait a few minutes and reload. |
| The login doesn’t work | The password was changed after install | Check Access Data → Credentials. If you changed it inside OpenWebUI, the page still shows the original one. |
| Select a model is empty | No model is connected | Follow Step 9. |
| A model is slow or won’t load | The model is too big for the server’s RAM | Pick a smaller model, or move to a server with more RAM or a GPU. |
Frequently asked questions
Do I need to write a docker-compose.yml to deploy OpenWebUI on xCloud?
No. Pick OpenWebUI in the One Click Apps catalog, choose a server, fill in the site details and click Next. xCloud sets up the container, the domain and HTTPS for you.
Does OpenWebUI include an AI model?
No. OpenWebUI is the chat screen. Connect it to Ollama on the same server with Enable Ollama, or add an OpenAI-compatible API in its Admin Panel.
Can other people sign up on my OpenWebUI site?
Not by default. xCloud installs OpenWebUI with sign-up closed and creates one admin account for you. Add other people from the Admin Panel in OpenWebUI.
Does the Update action work for OpenWebUI?
No. App Actions and Update are for apps installed from templates, and OpenWebUI is not one of them. To update OpenWebUI, contact the xCloud support team.
Related guides
- How to Deploy Ollama With xCloud One Click Apps
- How to self-host LLMs with xCloud
- Manage One Click App domains, to move a Demo Site to your own domain
- How to back up and restore Docker apps
- Explore the One Click Apps catalog
- Upstream: Open WebUI documentation
If you run into any issues deploying OpenWebUI, feel free to reach out to our support team.