

How to Deploy Keycloak With xCloud One Click Apps
Updated November 18, 2026 · 9 min read
Deploy Keycloak from Sites → New Site → One-Click Apps → Keycloak → choose a server → Continue → Demo Site or Go Live → Next. xCloud supplies the Keycloak template with its PostgreSQL database, so you do not write a docker-compose.yml. This guide is for xCloud users who want their own single sign-on server for apps and teams, with OpenID Connect, OAuth 2.0 and SAML.
What the Keycloak template includes
| Part | What it does | Good to know |
|---|---|---|
| Keycloak | The sign-in server and the Admin Console | Runs in production mode. It is only reachable through your domain over HTTPS, not by server IP and port. |
| PostgreSQL 17 | Stores realms, users, clients, keys and settings | Lives on its own data volume, keycloak_db. This is the data you back up. |
| Bootstrap admin | A temporary admin for your first sign-in | You choose the username. xCloud generates the password and shows it on the site. |
| Database login | The database name, user and password | xCloud generates them. You never type them in. |
Before you start
| Requirement | Recommendation | Why it matters |
|---|---|---|
| Server | An NGINX server. xCloud installs Docker on it if it is not there yet. | Keycloak runs in Docker. OpenLiteSpeed servers can’t run Docker. |
| Memory | At least 4 GB RAM | Keycloak runs on Java and sizes its memory from the server. 4 GB leaves room for PostgreSQL too. |
| CPU and disk | At least 2 vCPU and 5 GB free disk | The minimum the Keycloak template asks for. Add more for many users or frequent logins. |
| Domain | DNS access if you choose Go Live | Keycloak builds its sign-in and redirect links from your domain. |
Step 1: Find Keycloak in the catalog
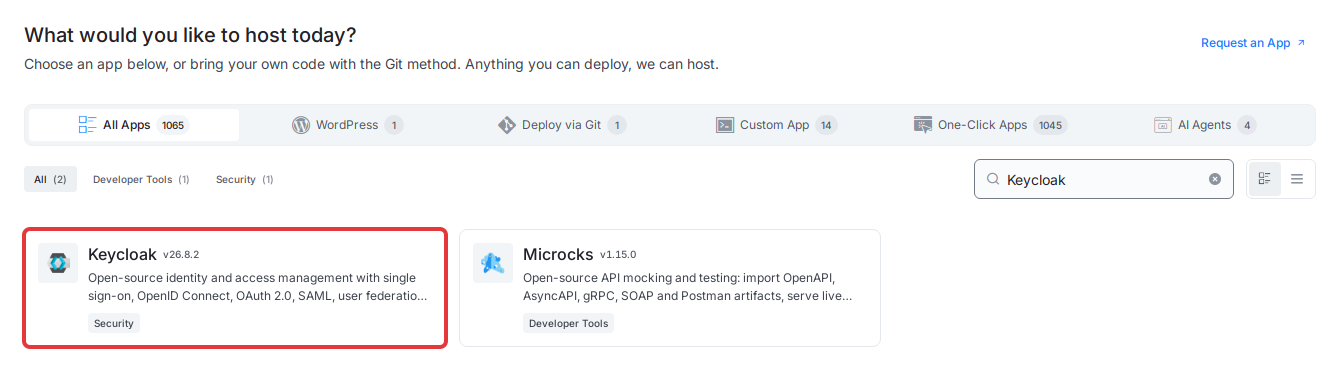
Go to Sites → New Site. Type Keycloak in Search apps… and click the Keycloak card.
Expected result: The Keycloak page shows Runs on Nginx, Docker, the recommended size (4 GB RAM · 2 vCPU · 5 GB disk) and the version it installs.
Step 2: Choose where it runs
Under Where should it run?, click one of your servers, or Deploy on a new server to create a dedicated one. Then click Continue.
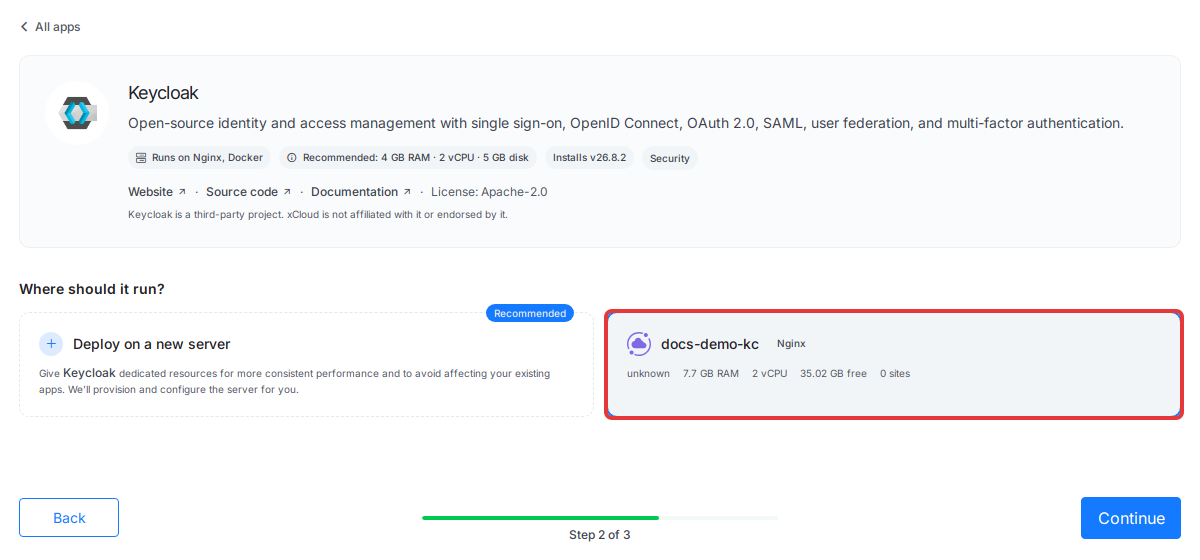
Expected result: xCloud opens the Install Keycloak Into form for the server you chose. A server that is too small or on the wrong stack can’t be picked, and its card says why.
Step 3: Fill in the site form
- Enter a Site Title, for example
Keycloak SSO. Tags are optional. - Under Domain Setup, choose Demo Site to try Keycloak on a test domain, or Go Live to use your own domain.
- Keep
adminin Bootstrap Admin Username, or type another name. It may use letters, numbers, dashes and underscores.
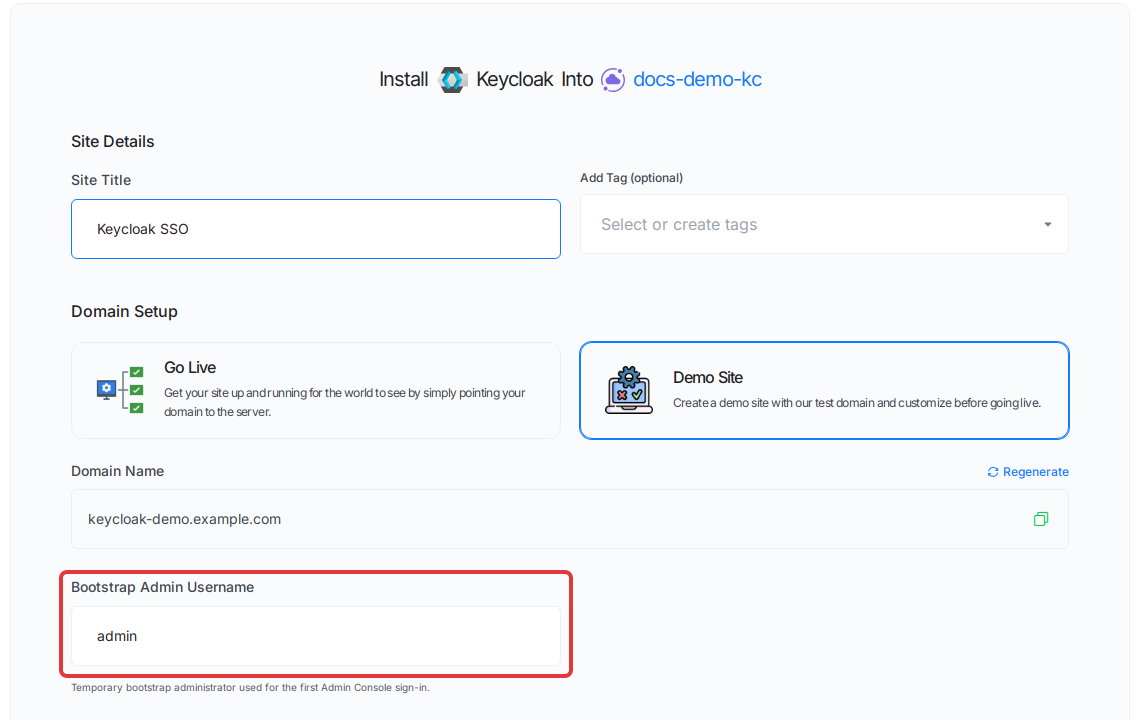
Expected result: The form shows your title, the domain and the admin username.
Step 4: Click Next and wait for the setup
Click Next. xCloud shows the setup progress: it checks the server, installs Docker if needed, sets up the app, then adds SSL and NGINX.
Expected result: The site opens on its overview when the setup is done. Keycloak’s first start also prepares its database, so the sign-in page can take a few more minutes to load.
Step 5: Copy the admin sign-in details
On the site’s Site Overview, the Keycloak Credentials card lists the Keycloak URL, the Admin Console link, the Bootstrap Admin Username and the Bootstrap Admin Password. The card also shows the installed Keycloak version. Click Copy next to the password and save it in your password manager.
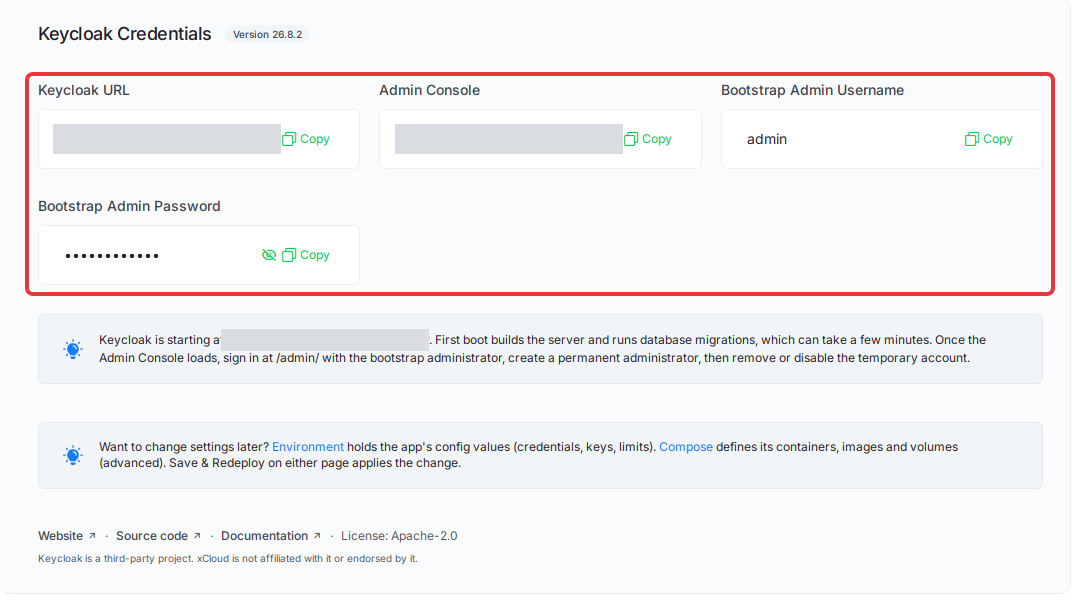
Expected result: You have the Admin Console link (your domain followed by /admin/) and the temporary admin login.
Step 6: Sign in and replace the temporary admin
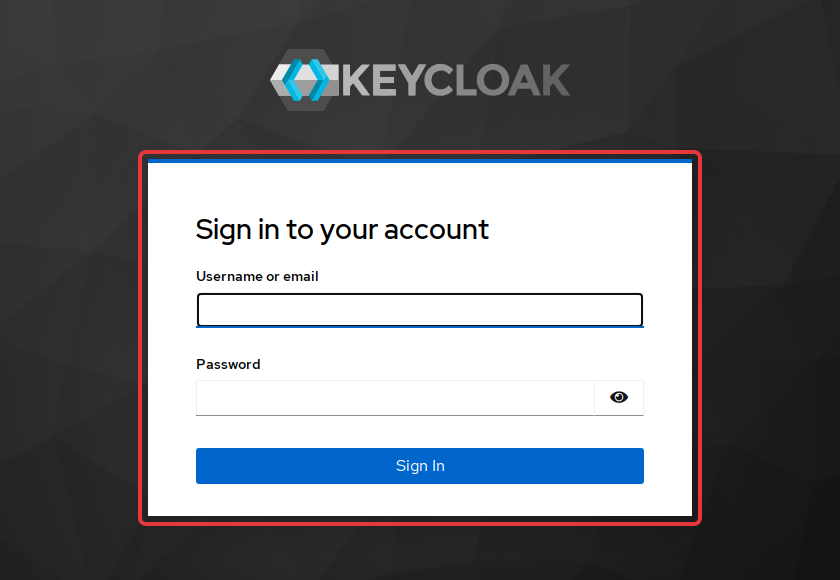
Open the Admin Console link. Keycloak shows Sign in to your account. Enter the bootstrap admin username and password, then click Sign In.
Then make Keycloak safe to use:
| Setup task | What to do | How you know it worked |
|---|---|---|
| Permanent admin | In the master realm, create a named admin user and give it only the admin roles it needs |
You can sign in as that user |
| Temporary admin | Sign in as the permanent admin, then disable or delete the bootstrap admin | The bootstrap login no longer works |
| Realm for your apps | Create a new realm for your users and apps. Keep master for admins only |
Your apps’ users and clients live in the new realm |
| Add SMTP settings in the realm before you turn on password reset or email checks | Keycloak sends a test email | |
| Clients | For each app, enter its exact redirect URIs and web origins. Avoid broad wildcards like * |
The app signs in and comes back to the right page |
If the Admin Console does not load yet, wait a few minutes and refresh. The first start builds the server and sets up the database.
Back up and update Keycloak
Everything Keycloak knows (realms, users, clients, keys) is in its PostgreSQL database on the keycloak_db volume. Back it up before every change:
- Take a database backup, for example with
pg_dump, and keep a copy off the server. Back up and restore Docker apps covers the xCloud side. - Test a restore on a separate site before you rely on it.
The template pins one Keycloak version. App Actions → Update pulls that same version again, it does not upgrade you. To move to a newer Keycloak, read Keycloak’s upgrade notes, back up the database, then change the image tag as shown in Update a One Click App and edit its Docker Compose. Don’t change the PostgreSQL major version (17) without a database migration plan.
Changing KC_BOOTSTRAP_ADMIN_USERNAME or KC_BOOTSTRAP_ADMIN_PASSWORD in the environment later does nothing to existing admins. To change the database password, change it in PostgreSQL first, then update both POSTGRES_PASSWORD and KC_DB_PASSWORD in the environment editor and redeploy.
Troubleshooting
| Problem | Likely cause | Fix |
|---|---|---|
| Your server can’t be selected | It has less than 4 GB RAM, 2 vCPU or 5 GB free disk, or it runs OpenLiteSpeed | Pick an NGINX server with enough room, or choose Deploy on a new server |
| The Keycloak URL shows an error right after setup | Keycloak is still starting and preparing its database | Wait a few minutes and refresh |
| The bootstrap password doesn’t work | The temporary admin was already removed, or the password was copied with extra spaces | Sign in with your permanent admin. Copy the password again from the Keycloak Credentials card |
| An app gets “Invalid redirect URI” | The client’s redirect URI does not match the app’s exact URL | Add the exact URL under the client’s valid redirect URIs |
| Keycloak is slow or restarts under load | Not enough memory for Java and PostgreSQL | Move to a larger server and watch memory in server monitoring |
Frequently asked questions
Do I need a custom docker-compose.yml to deploy Keycloak on xCloud?
No. The One-Click Apps catalog supplies the Keycloak template. You pick Keycloak, choose a server, fill in the site form and click Next.
What size server does Keycloak need on xCloud?
The Keycloak template asks for at least 4 GB RAM, 2 vCPU and 5 GB of disk. Keycloak runs on Java and sizes its memory from what the server has, so give busy login traffic more room.
Can I change the admin password by editing the environment variables?
No. The bootstrap admin username and password only create the temporary admin the first time Keycloak starts. After that, manage admins inside the Keycloak Admin Console.
Does Update move my Keycloak to a newer version?
No. The template pins one Keycloak version, so Update pulls that same version again. To move to a newer Keycloak, back up the database first, then change the image tag on the app’s Compose page.
Related resources
- Keycloak hosting on xCloud: plans and what is included
- How to use One-Click App Templates: App Actions, the environment editor and events
- Update a One Click App and edit its Docker Compose
- Back up and restore Docker apps
- Browse the One-Click Apps catalog
- Keycloak’s own guides: Server Administration and Upgrading
If you run into any issues while deploying Keycloak, feel free to reach out to our support team.